
Mantener tu sistema de riego en buen estado de funcionamiento es una de las formas más sencillas de ahorrar agua y conservar un Paisajismo saludable. Por eso, a través de la iniciativa Resource CentralSlow the Flow (reduce el desperdicio de agua) y otros programas de ahorro de agua, compartimos consejos prácticos para ayudar a los propietarios a reducir el desperdicio de agua y a mantener sus sistemas de riego funcionando de manera eficiente.
Un aspersor roto puede parecer un problema menor, pero puede desperdiciar cientos de galones de agua, dejar zonas secas en el césped y aumentar la factura del agua. Afortunadamente, sustituir un aspersor es una de las reparaciones más sencillas que los propietarios pueden realizar por sí mismos.
Tanto si el cabezal de tu aspersor se ha dañado con el cortacésped, como si no gira correctamente o ya no se eleva, esta guía te explicará paso a paso cómo sustituirlo.
Señales de que hay que cambiar el cabezal de un aspersor
Antes de coger las herramientas, asegúrate de que el problema realmente esté en el cabezal del aspersor. Algunos indicios habituales son:
- El agua sale por cualquier sitio que no sea la boquilla
- Se acumula agua alrededor del cabezal del aspersor
- El cabezal del aspersor no se eleva ni se retrae
- Carcasa del aspersor agrietada o rota
- Riego desigual o zonas secas en tu Paisajismo
Sustituir un cabezal de riego dañado puede restablecer una cobertura uniforme y contribuir a que tu sistema de riego funcione de forma más eficiente.
Lo que necesitarás
Antes de empezar, prepara lo siguiente:
- Una pala pequeña o una herramienta de jardinería multiusos, como un cuchillo «hori hori»
- Cabezal de rociador de recambio
- Adaptador (si es necesario)
- Cubo para la tierra y la hierba retiradas
- Guantes de jardinería
Cómo cambiar el cabezal de un aspersor
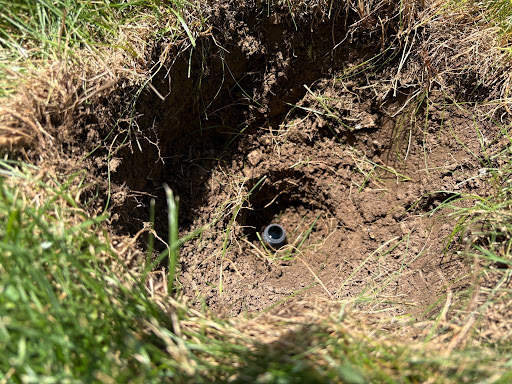
Paso 1: Excava alrededor del cabezal del aspersor
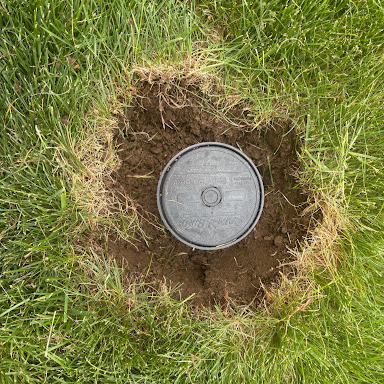
Excava con cuidado unas pocas pulgadas alrededor del cabezal del aspersor con una pala pequeña. Coloca la tierra y la hierba que hayas sacado en un cubo para que te resulte más fácil rellenar el agujero más tarde.
Ten cuidado de no dañar la tubería de riego lateral que hay bajo la superficie.
Paso 2: Retira el cabezal de riego antiguo
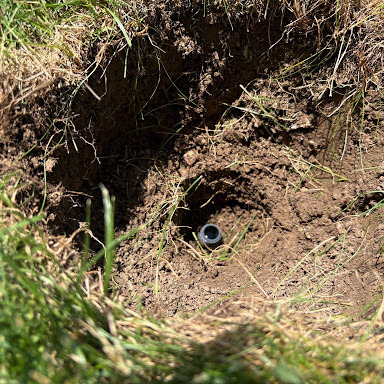
Una vez que hayas dejado al descubierto una parte suficiente del conjunto del rociador, desenrosca el cabezal del rociador antiguo del tubo ascendente o de la articulación oscilante.
- Consejo de experto: Intenta que no entre suciedad en la tubería abierta. Si entra tierra, activa brevemente esa zona de riego para expulsarla antes de instalar el nuevo aspersor.
Paso 3: Comprueba el tamaño de la rosca
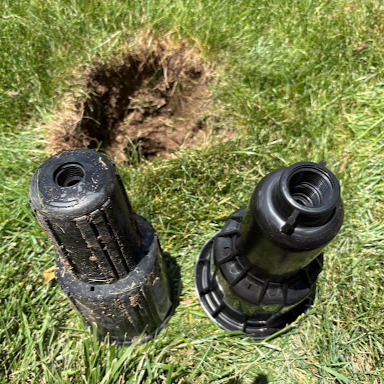
Antes de instalar el nuevo aspersor, compara el diámetro de la entrada con el del antiguo.
La mayoría de los cabezales de rociadores residenciales utilizan:
- Entrada de 1/2 pulgada
- Entrada de 3/4 de pulgada
Si los tamaños no coinciden, necesitarás un adaptador antes de instalar la pieza de recambio.
Paso 4: Instalar un adaptador (si es necesario)
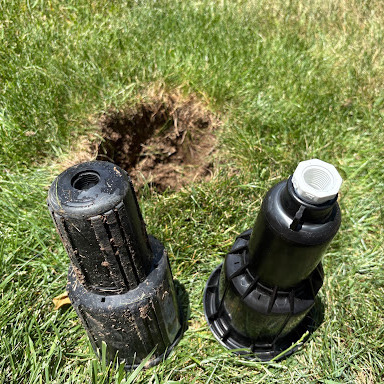
Si el cabezal de riego de repuesto tiene un tamaño de entrada diferente, coloca primero el adaptador adecuado.
Por ejemplo, es posible que necesites un adaptador de 3/4 de pulgada a 1/2 de pulgada, que suele encontrarse en la sección de fontanería de la mayoría de las ferreterías.
Paso 5: Instalar el nuevo cabezal de riego
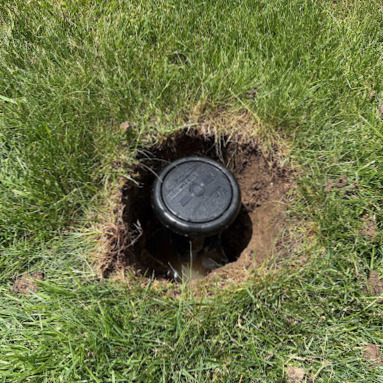
Enrosca el nuevo cabezal de riego en el tubo vertical o en la unión giratoria.
Antes de continuar, asegúrate de que:
- La tapa está bien ajustada, pero sin apretarla en exceso.
- La parte superior del aspersor queda a ras del suelo.
- El tope de rotación del aspersor (tope fijo) está ajustado correctamente según las instrucciones del fabricante.
Paso 6: Rellenar el agujero
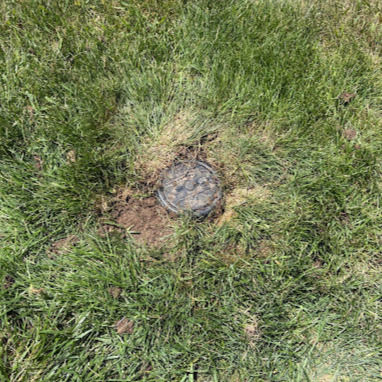
Vuelve a colocar la tierra y el césped que habías retirado antes, presionando suavemente con el pie para que todo quede bien asentado.
El cabezal del aspersor debe quedar a la misma altura que el césped que lo rodea.
Paso 7: Probar el aspersor
Activa tu zona de riego y observa cómo funciona el nuevo aspersor.
Comprueba que:
- El aspersor se eleva correctamente.
- El agua está cubriendo la zona prevista.
- El arco y el radio de pulverización están ajustados correctamente.
Realiza los últimos ajustes antes de pasar a la siguiente zona.
Consejos para reparar correctamente un sistema de riego
- Sustituye rápidamente los cabezales rotos para evitar el desperdicio de agua.
- Siempre que sea posible, elige un cabezal de riego nuevo que sea compatible con el modelo antiguo.
- Evita apretar en exceso, ya que podrías dañar los accesorios de plástico.
- Mantén los cabezales de los aspersores a la misma altura que el suelo circundante para evitar que se dañen con el cortacésped.
- Pon en marcha el sistema de riego después de cada reparación para comprobar que todo funciona correctamente.
Frequently Asked Questions
¿Puedo cambiar yo mismo el cabezal de un aspersor?
Sí. La mayoría de los propietarios pueden cambiar un cabezal de aspersor en unos 20 o 30 minutos utilizando herramientas manuales básicas.
¿Cómo sé qué cabezal de aspersor debo comprar?
Comprueba la marca, el modelo, el patrón de pulverización y el diámetro de entrada de tu cabezal de riego actual. Elegir un recambio que coincida con estos datos te ayudará a mantener una cobertura de riego adecuada.
¿Por qué mi nuevo aspersor no rocía correctamente?
Es posible que haya que ajustar el arco de rociado, el radio o el límite de rotación. Siga las instrucciones del fabricante para ajustar con precisión la cobertura tras la instalación.
Mantén tu sistema de riego funcionando de forma eficiente
El mantenimiento periódico de los aspersores ayuda a evitar el desperdicio de agua y mantiene tu Paisajismo . Sustituir los cabezales de los aspersores dañados es una de las formas más sencillas de mejorar el rendimiento del riego y reducir el consumo innecesario de agua.
Resource Central» Slow the Flow (reduce el desperdicio de agua) evaluarán si su sistema de riego funciona de manera eficiente. Durante esta cita gratuita, profesionales del riego inspeccionarán su sistema, realizarán pequeños ajustes, identificarán posibles problemas y le ofrecerán recomendaciones personalizadas de riego para ayudarle a ahorrar agua durante toda la temporada.