DIY Hexagonal Table
by Michelle Considine
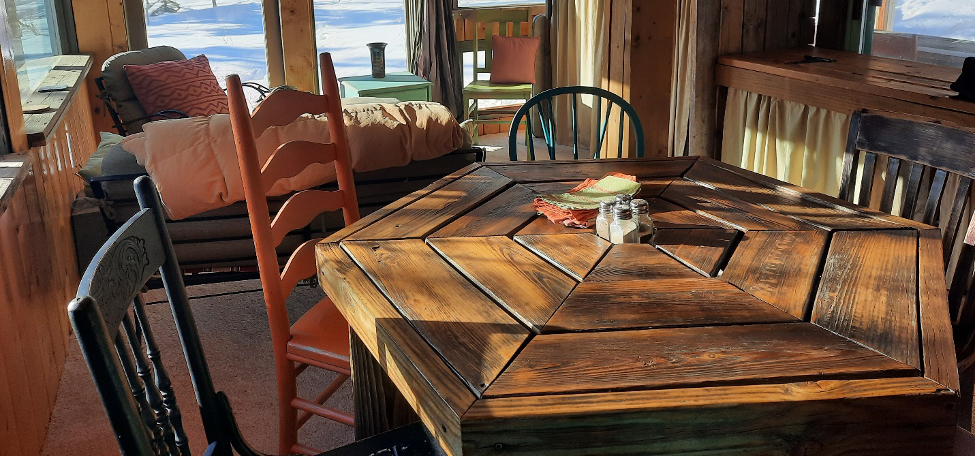
On a lucky day, you can find a table at Resource Central. If just owning a picnic table is your goal, this article about how to build one might not be for you. But, if DIY is your thing, read on!
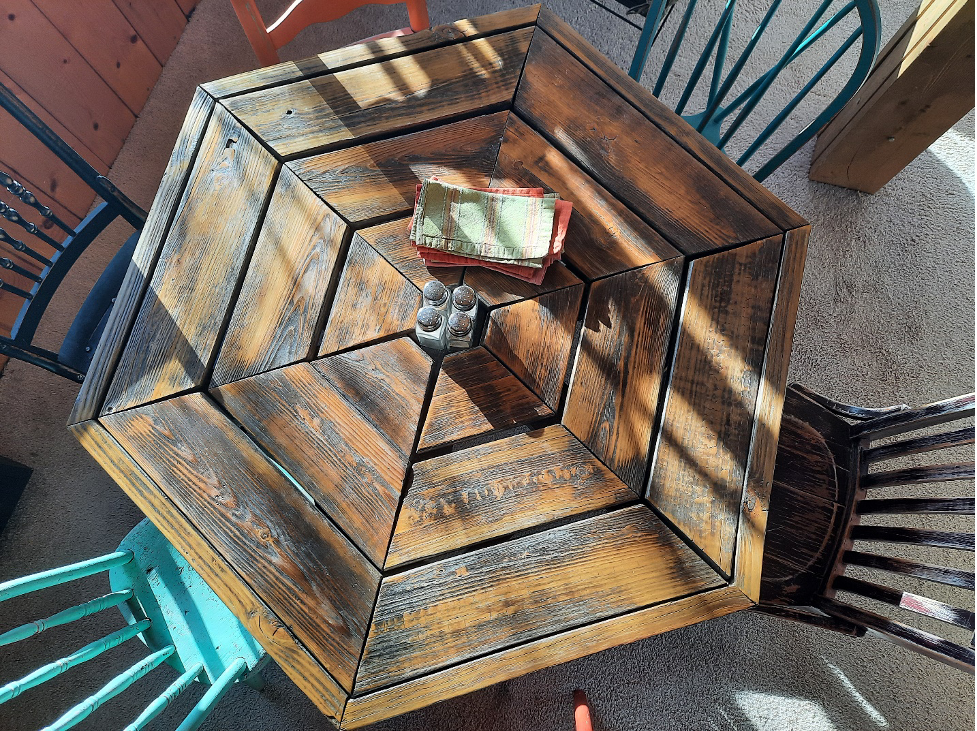
Being a math tutor and DIY enthusiast, it’s not surprising that I built a hexagonal picnic table. After sitting outdoors, uncovered for 16 years, it was promoted to indoor table in a cabin where it’s been for over a decade. Though other tables might be simpler in design, this table was fun to build and has stood the test of time, despite my non-professional carpentry skills!
I built this table before Resource Central was up and running. To get the finished look of this table without 16 years of outdoor curing, Resource Central is the place for your supplies. Someone else has kindly aged wood just for you!
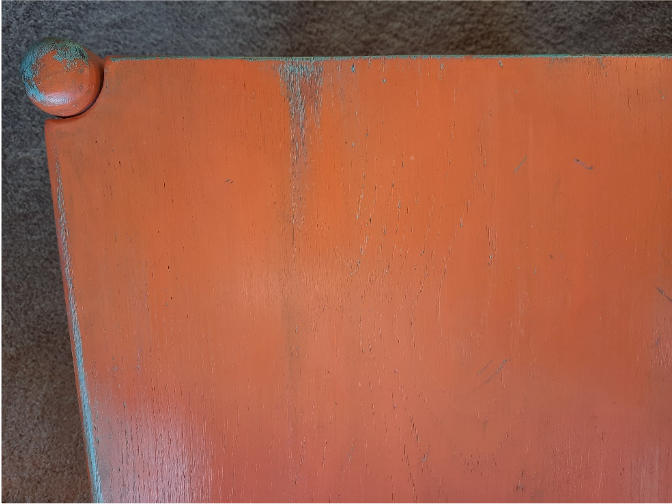
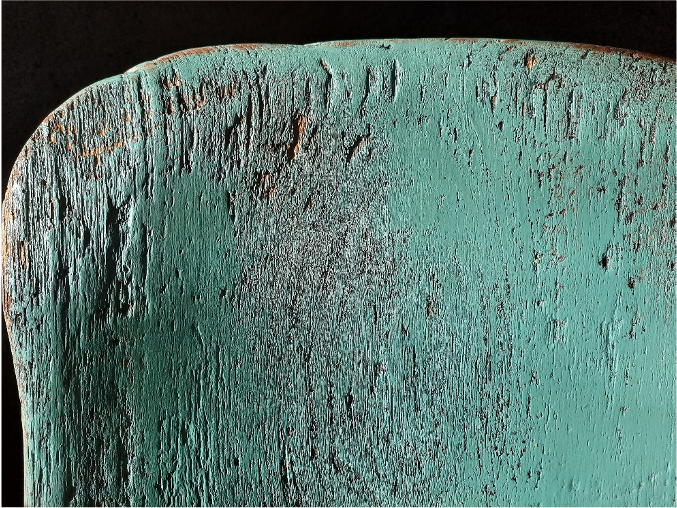
Below, I show sketches which include the angles for cutting the wood for the top and sides. Before we get into those details, I’ll point out that the chairs are a collection of flea market and thrift store chairs. I painted each one to go with the other furnishings of the cabin. Some of the chairs are quite old, but most are just random wooden chairs. I painted them to either bring out existing texture or add a little interest by layering contrasting colors. Here are 2 examples:
Back to the Table
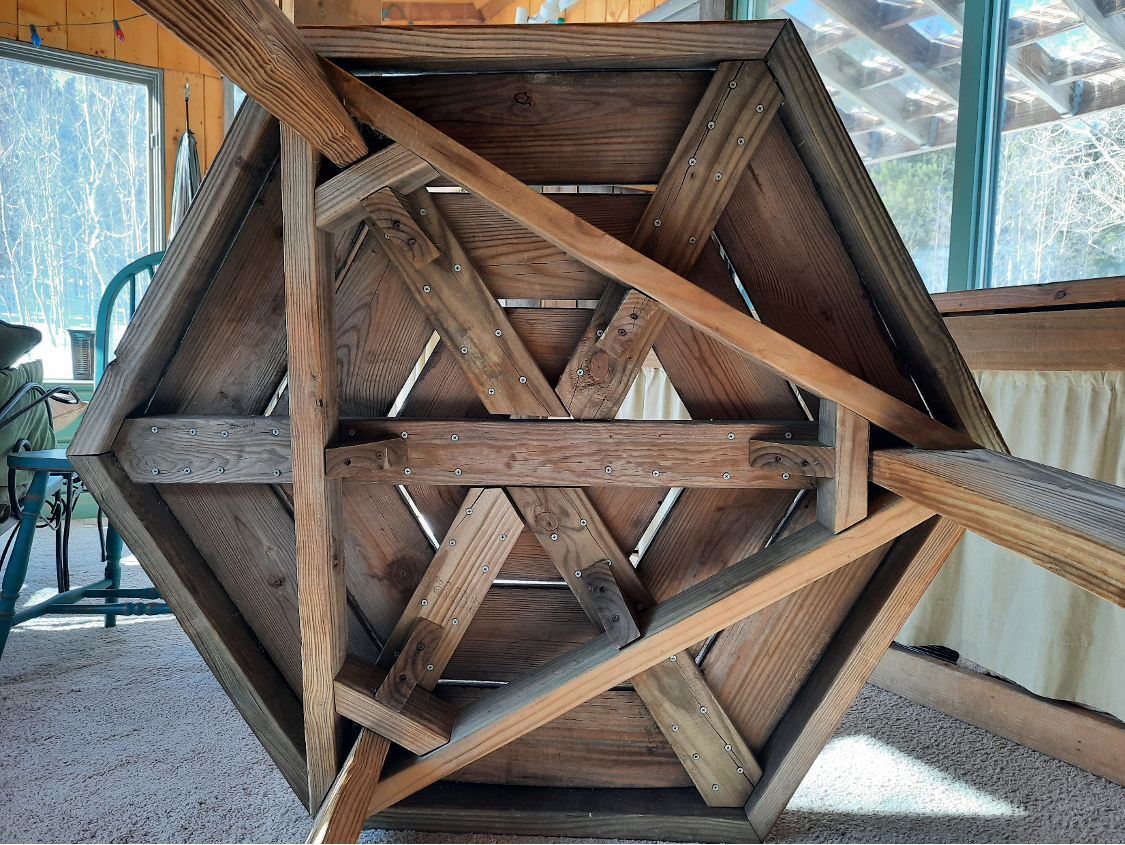
As you can see from the photos below, the table is supported by 3 legs at alternating corners of the hexagonal top. The structure of the top is hidden below the concentric hexagonal rings. All of the pieces of wood were cut using a miter saw which is a tool that you can rent from the Tool Library at Resource Central. If you’re unfamiliar with a miter saw, watch a few YouTube videos about the tool and safety of use. You might want to rent a portable workbench from Resource as well. Let’s get over the hurdle of all those angles for the hexagonal top. As you’ll see, it’s not so bad!
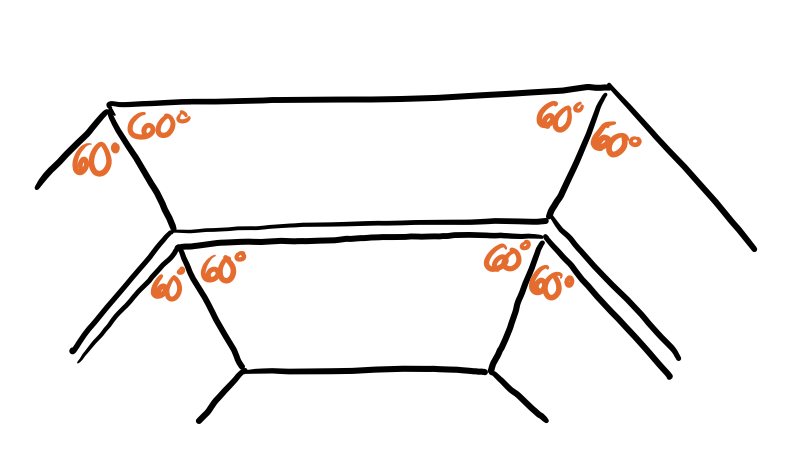
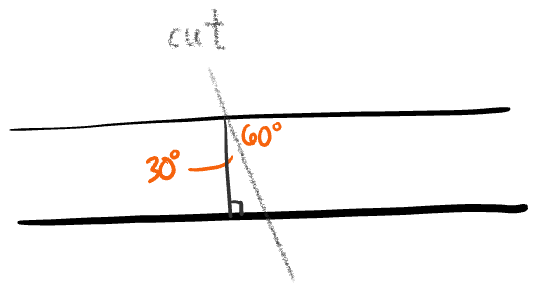
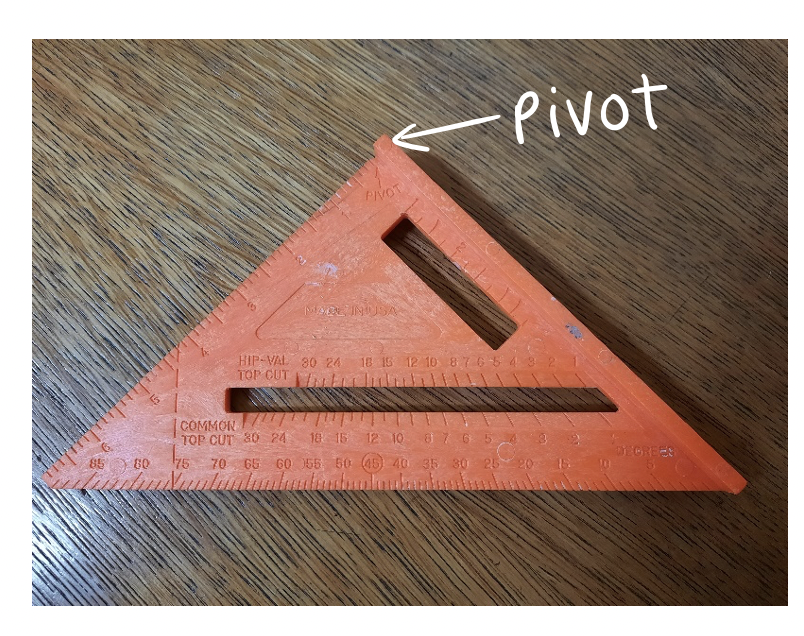
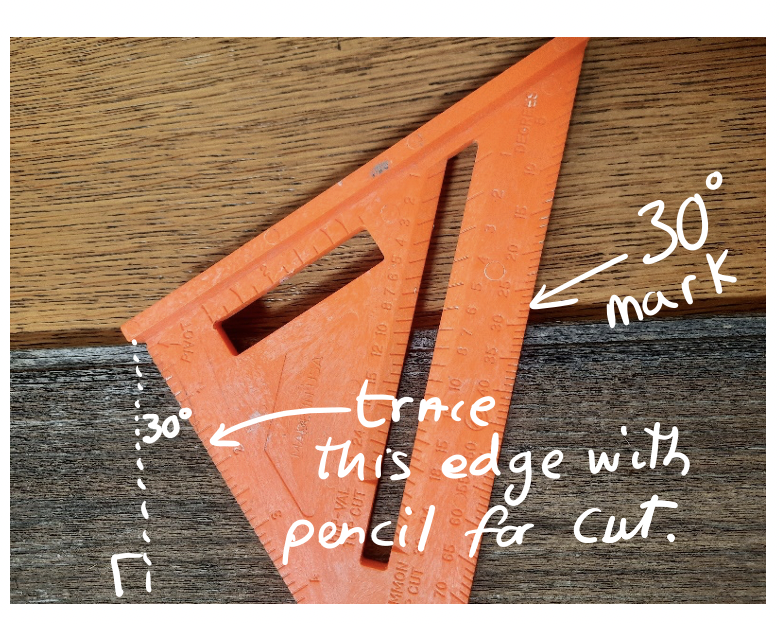
Get to know your friend, the speed square! This is a tool that I first learned about when I was making this table. I’ve found it invaluable ever since. Notice that the PIVOT is at the square corner. The angles are shown on the opposite side of the triangle. See photos below.
If you’re working with upcycled materials that might have lead-based paint, use appropriate precautions. If you might be working with lead-based paint, buy a lead testing kit at a hardware store. The COVID era N95 masks might be useful beyond COVID after all. If you don’t test old paint, assume it is lead-based.

Supplies
- Drill
- Power Screw Driver
- Miter Saw
- 4 8′ long 1×6 Deck Boards
- 7 8′ long 2 x4s
- Speed Square
- Screws
Underbelly of the Table
Let’s see how this thing stands up. The boards which are part of the hexagonal rings are screwed to the frame from the bottom, so there are no screws showing on the top.
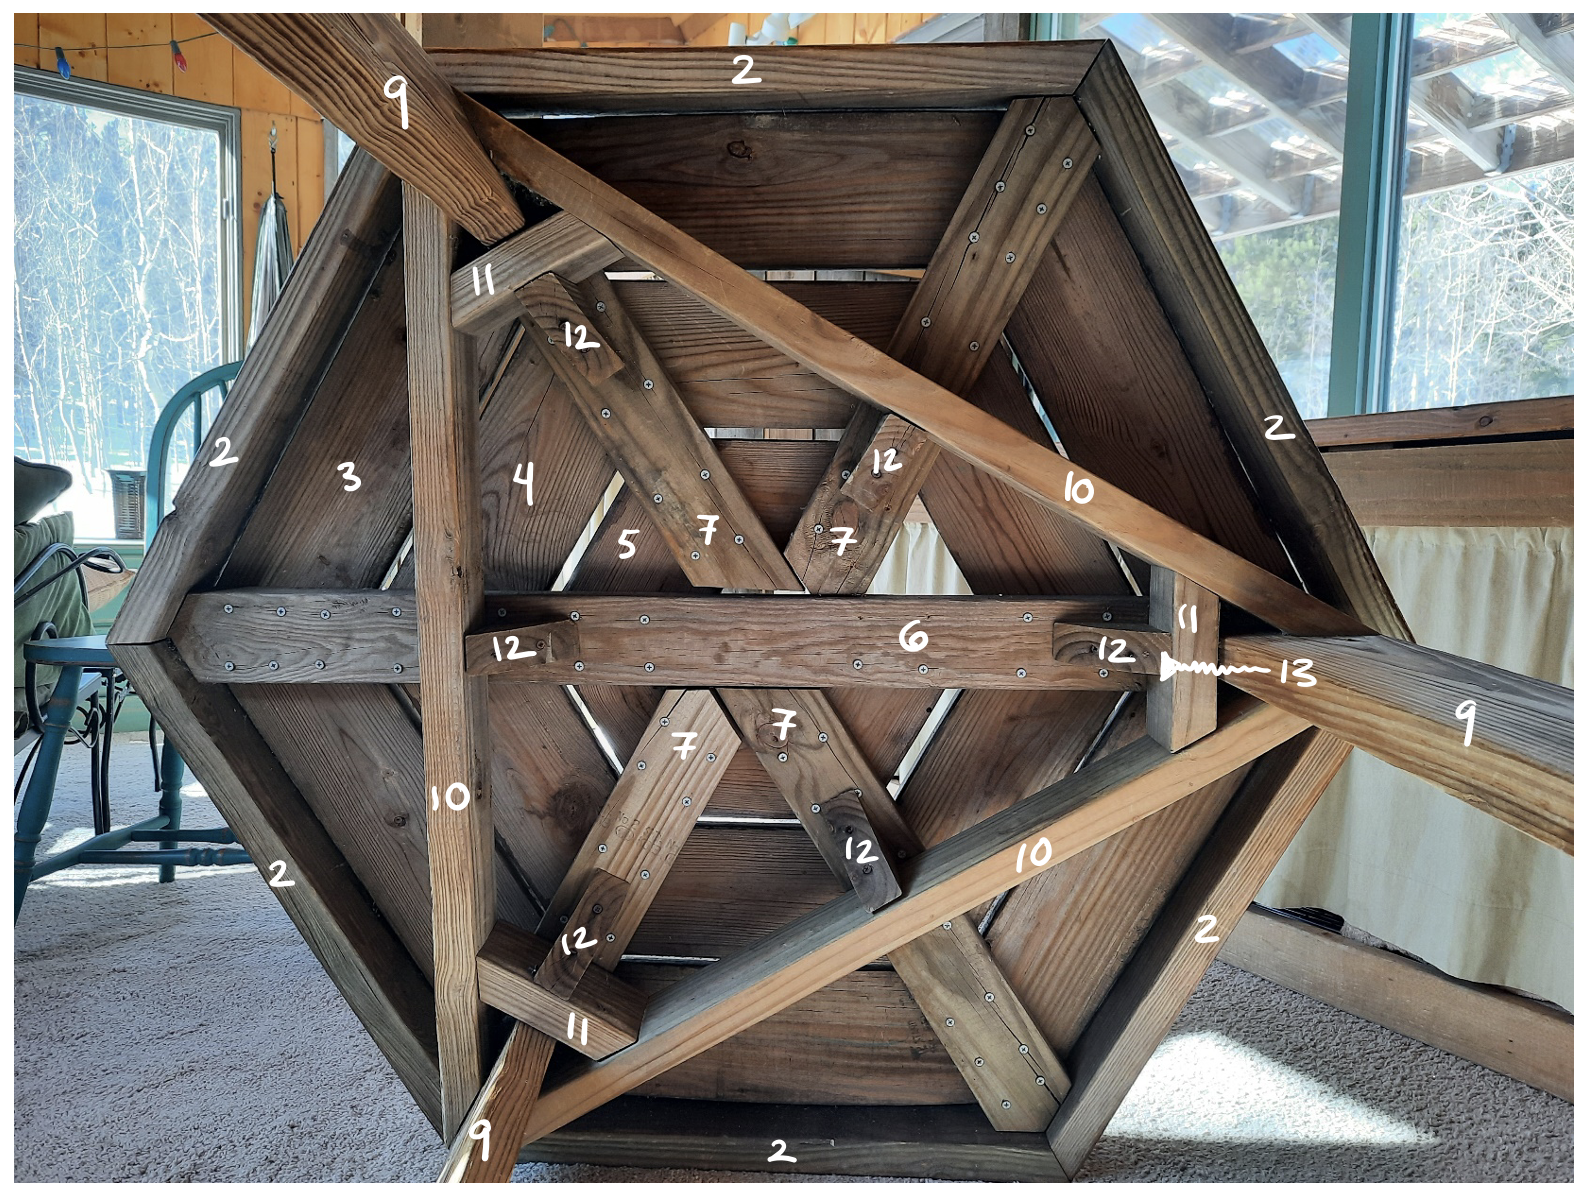
Instructions: The numbered pieces in the diagram above correspond to the following instructions.
- Prepare a large, flat surface for assembling the table. (A garage floor or a patio might serve this purpose.) We will build the table upside down, so set the pieces top-down. This table is 48 inches across.
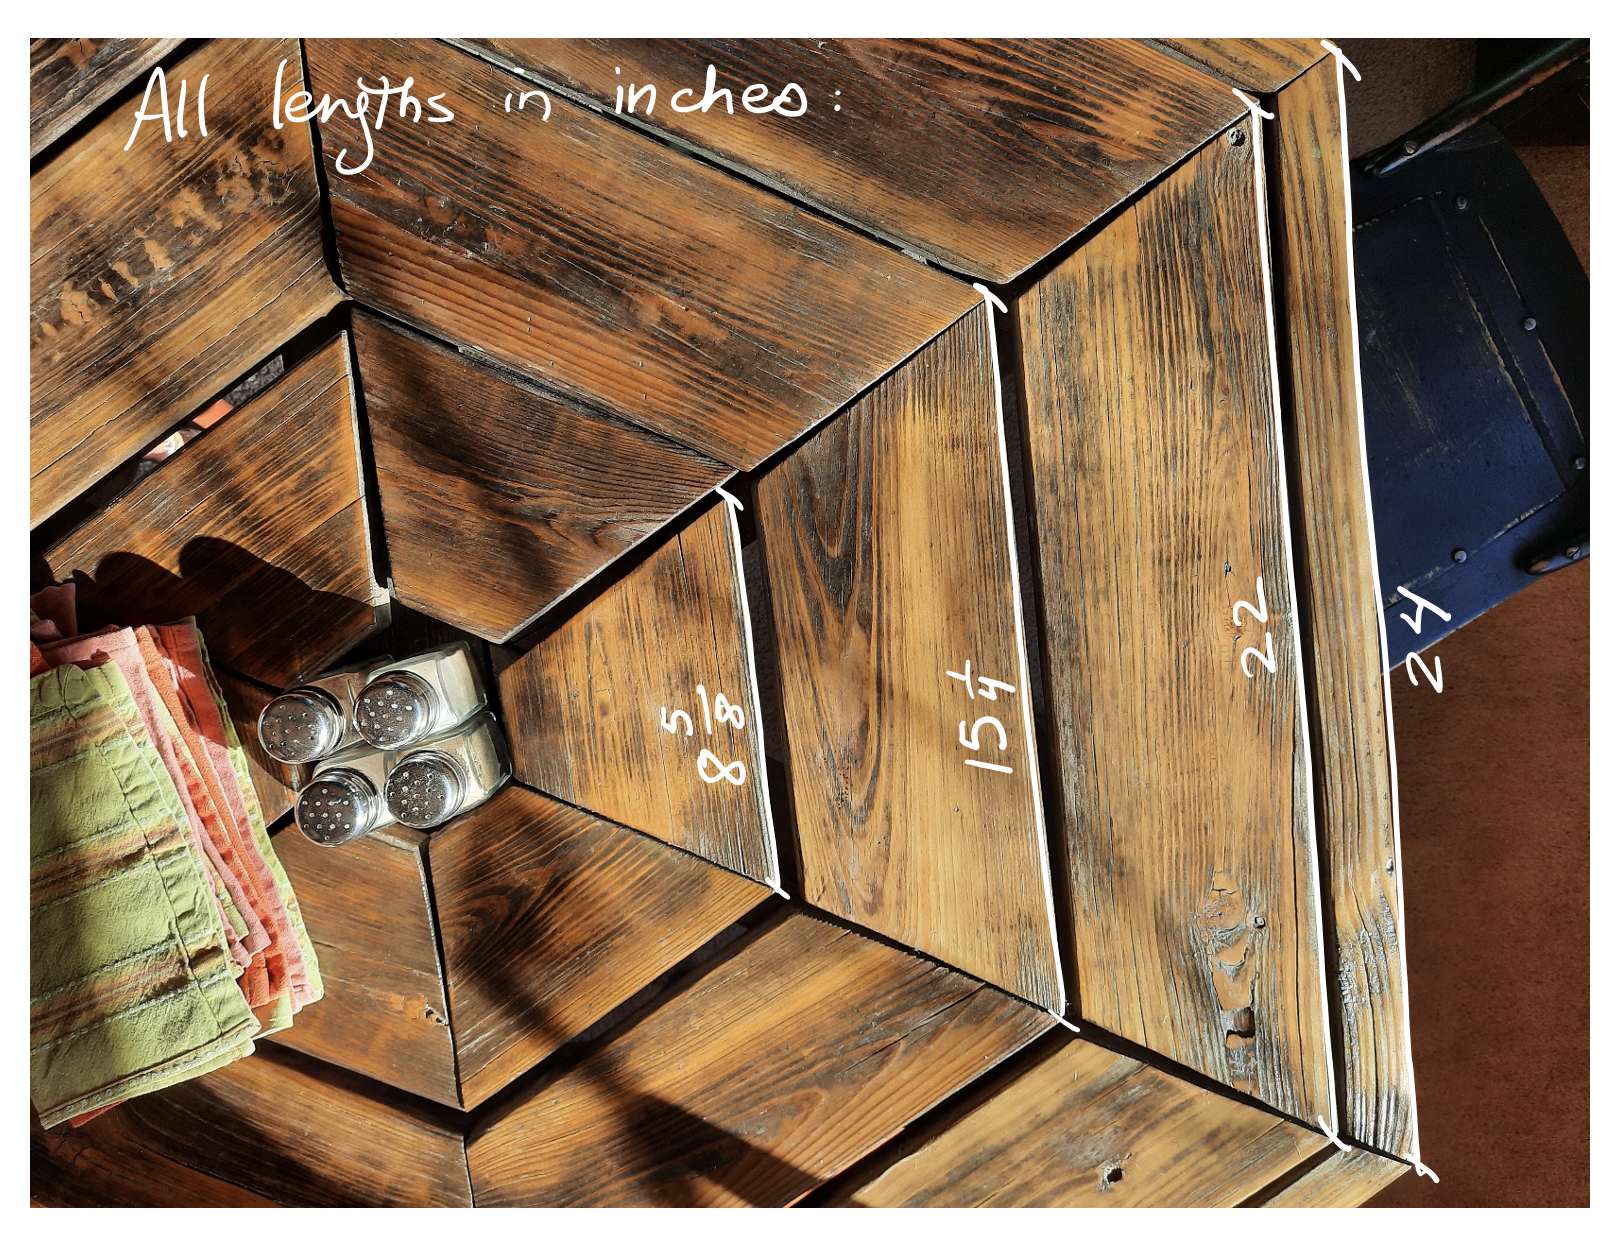
- Cut 6 2x4s to serve as the outer edges. Be sure to note the orientation of the boards before you use the miter saw. If you want your table to be 48 inches across, then cut each piece to be 24 inches (The table width will be exactly double the length of the edges. I heart hexagons!)
- The outer hexagonal ring for the top of the table consists of 6 boards which are each 1×6 deck boards cut to 22 inches on the long side. See above for instructions on cutting the angles.
- The middle hexagonal ring for top of table is 6 pieces which are each 15 1/4 inches on the long side.
- The inner hexagonal ring for the top of the table is 6 pieces cut at 8 5/8 inches on the long side.
- Cut one diagonal by laying it on your hexagonal rings and marking where the cuts should be. Notice which side of your cut the saw blade should be on! See the photo above for details.
- Cut the other 4 pieces that lie along the diagonals. Again, mark the cuts while holding the wood over the intended position of the piece. Notice which side the saw blade should be on.
- Get out the power drill and screw driver. We are ready to attach all of the diagonal pieces to the hexagonal rings and attach the outer 2x4s to the diagonal frame pieces. Drill pilot holes through the diagonals and 2x4s. Tip: It is really helpful to have a helper to hold the pieces that are being screwed together.
- Cut 3 legs. In this table each leg is 27 3/4 inches They are 2×6 boards.
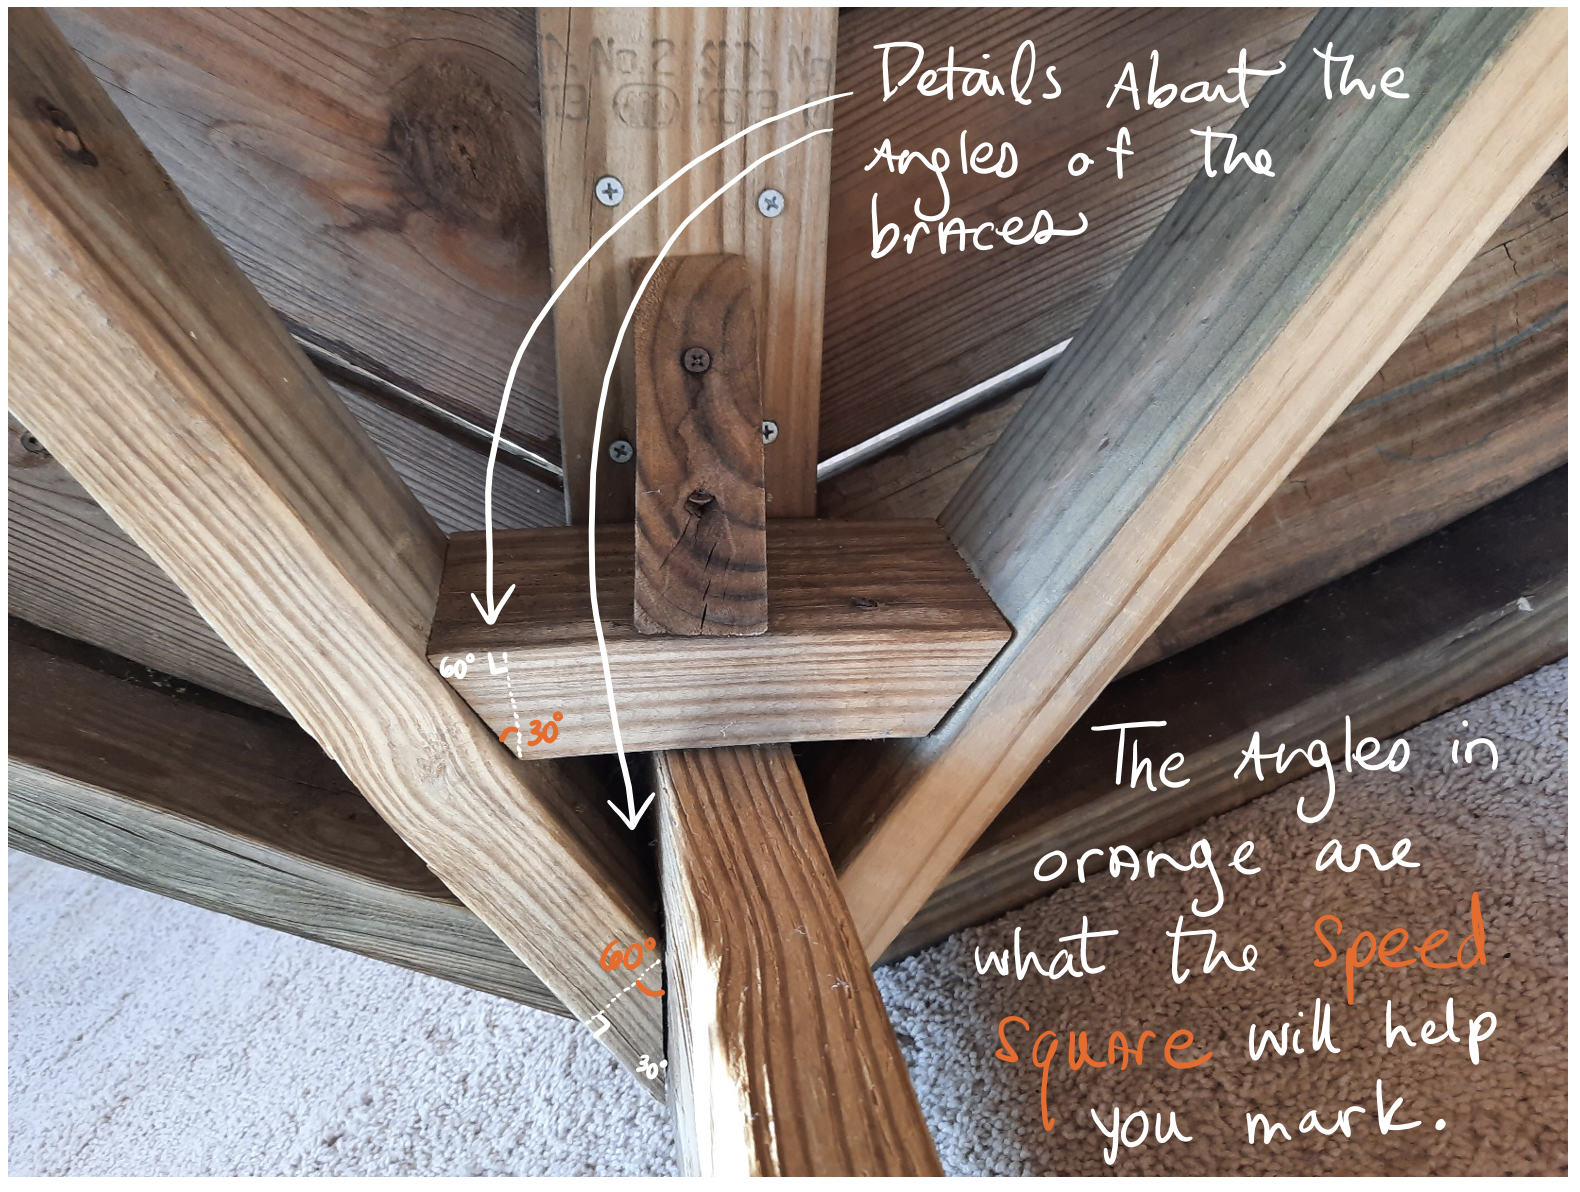
- Cut 3 long, lateral braces which are 35 5/8 inches on the long side. Use a 60 degree angle for these cuts. See details in photos below.
- Cut 3 medium length braces which are 6 1/4 inches on the long side. Use a 30 degree angle for these cuts.
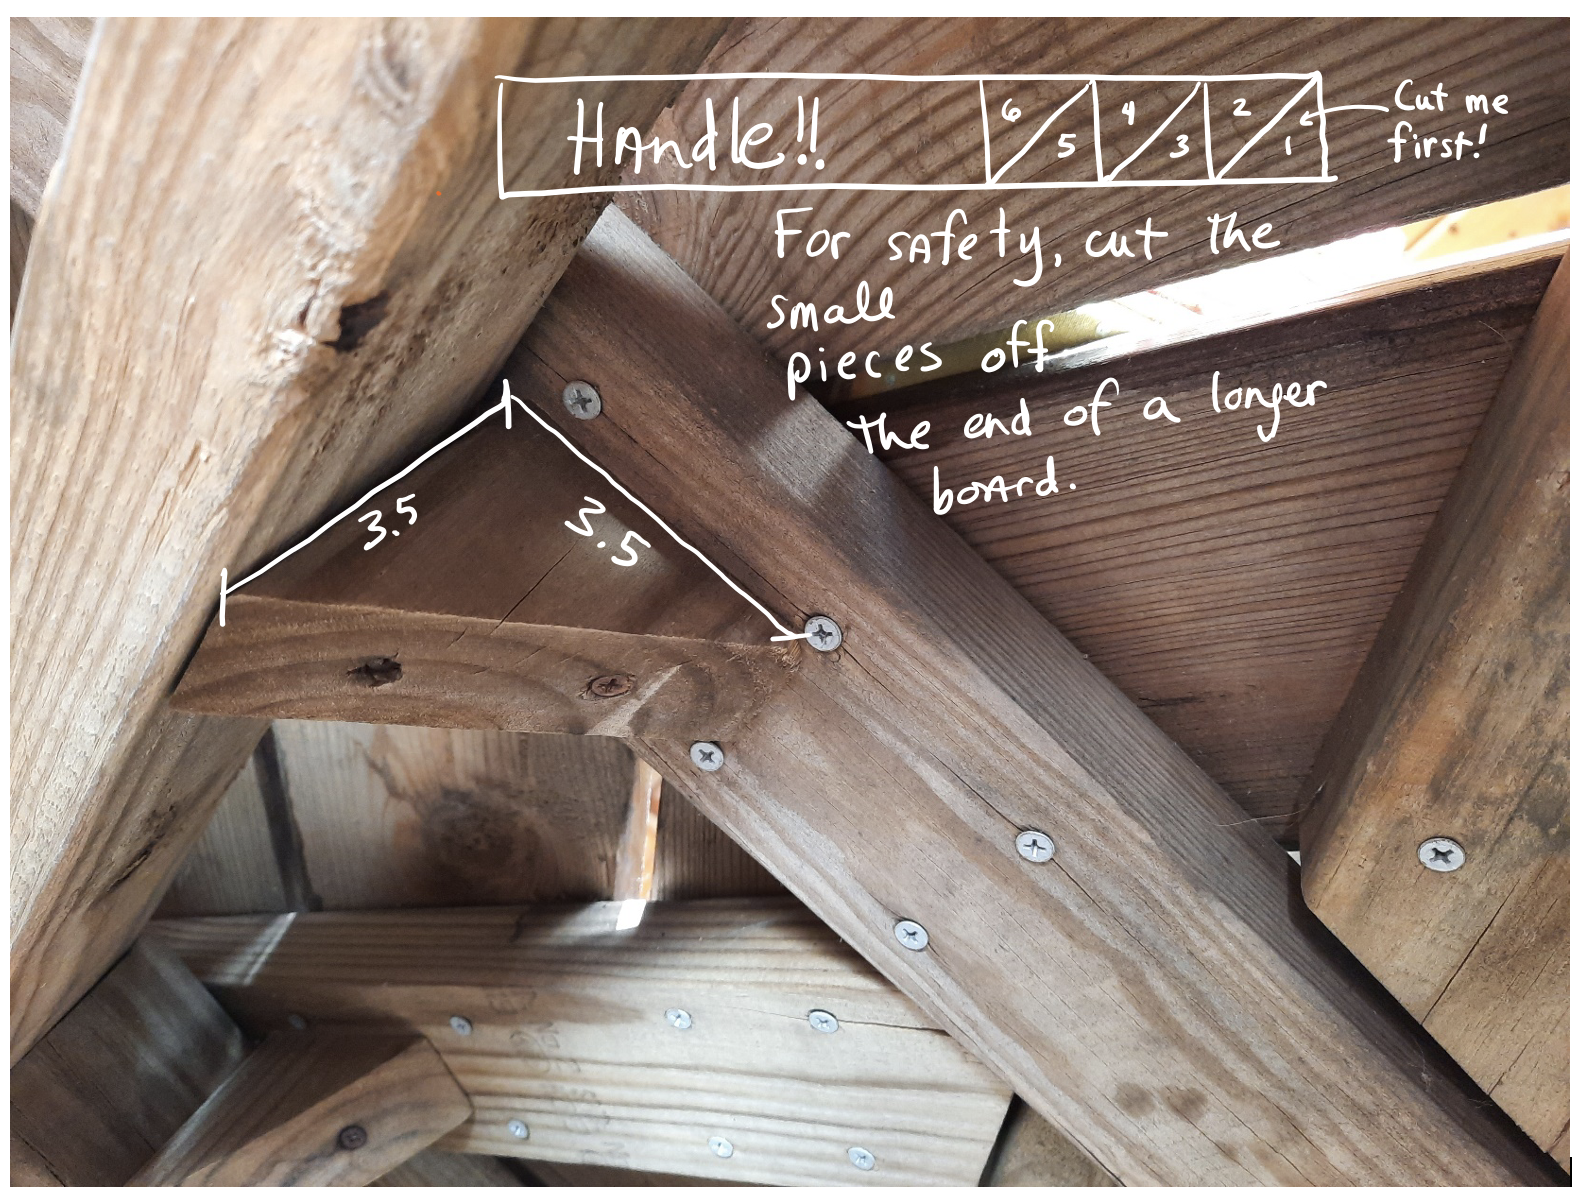
- Cut 6 little braces which are 3 1/2 inches on two of the sides. Note: Be safe!! Cut each little piece off of the end of a longer board. See details in one of the photos.
- Screw the legs and braces together as shown in the photo. The only hidden screws are through the medium length braces into the legs, as indicated in the photo.
- Notice that the legs and braces are attached to the table top only by the 6 little braces!
- Sand, stain, paint, and/or polyurethane to obtain your desired finish. The ideal finish depends on the intended use of the table. For an outdoor table, paints and polyurethanes tend to peel off if exposed directly to water and/or sun. I left this table naked for its outdoor years. For an indoor table, paint and/or polyurethane is an option. For its indoor years, I lightly sanded the table top and applied two coats of polyurethane (clear satin finish). Since you won’t need much, try to find some at Boulder’s Hazardous Material Management Facility. Supplies are free to Boulder Country residents!
More Photos
If you really inspect these photos, you might not be surprised to learn that most of the windows and doors of this room were from Resource Central, as were the light fixtures, trim and windowsills. The storage structure to the back right is also made of primarily weathered 2x6s from Resource Central. There are so many possibilities with reuse!

Michelle Considine, long time enthusiast of Boulder’s Resource Central and, more recently, Art Parts, volunteers for these organizations with the intention of promoting reuse and creativity. Aside from being an environmentalist and upcycling artist of many mediums, Michelle privately tutors high school math and physics in the Boulder area as well as online, hikes year-round, and loves time with her family and friends.
