Lawn Replacement Library
Welcome to the Lawn Replacement Library! Navigate through the content using the tabs below to explore the removal options, planting tips, and water-efficient techniques of xeriscaping. Tailored for both beginners and gardening enthusiasts, our library helps anyone get their waterwise project off the ground. Explore landscaping practices, conservation tips, and visual inspiration.
Find Inspiration Here
Explore a Project Topic
Choose a topic from the tabs below to learn more. We cover everything from taking photos to drip conversion. Please explore the page to find helpful tips and tricks to complete your xeriscape project!
How to Find the Right Space
Got a bit of lawn you could happily part ways with? We’ve got your back at Resource Central! Say goodbye to that not-so-functional turf, and let’s identify the perfect spot that’s just begging for a makeover. No more mindless mowing – we’re here to guide you in choosing the ideal area. Check out these handy tips to pinpoint the right spot and get ready for a lawn transformation!
Location Matters
Choose the perfect spot to kickstart your project, focusing on those areas previously deemed non-functional turf.
Ensure the selected area receives adequate sunlight for the plants you have in mind.
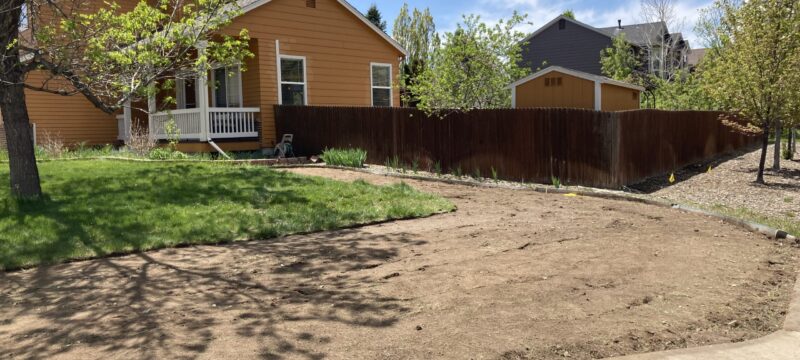
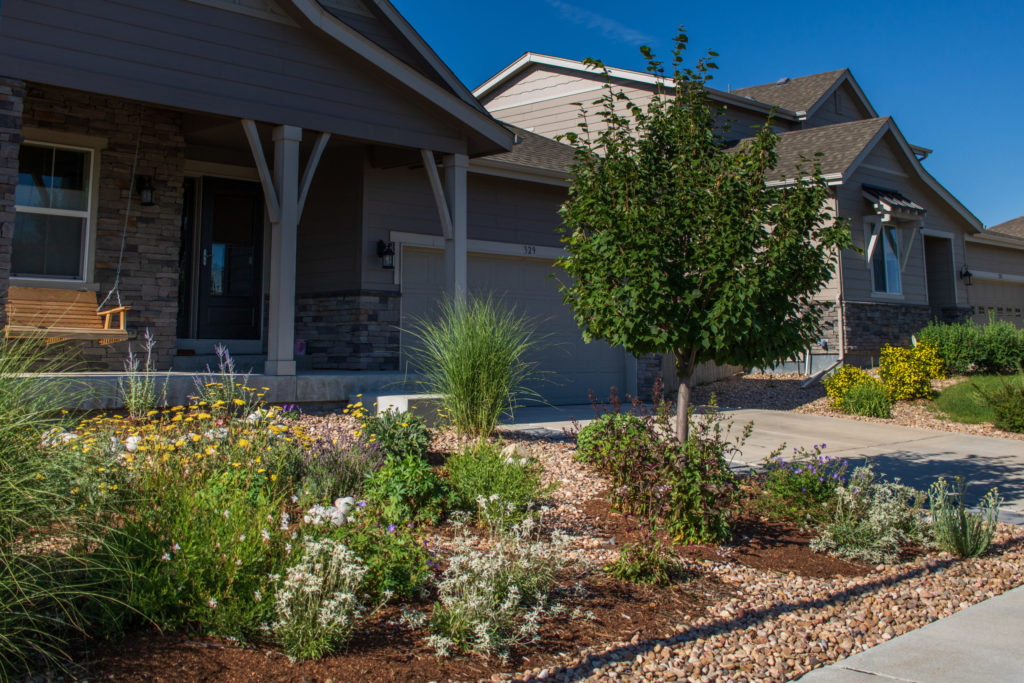
Front yards steal the show for xeriscape projects, boosting your home’s curb appeal and allowing for easy section-by-section upgrades.
Side yards are a hidden gem – transforming a visually unappealing stretch of turf into a vibrant ecosystem with pollinator plants.
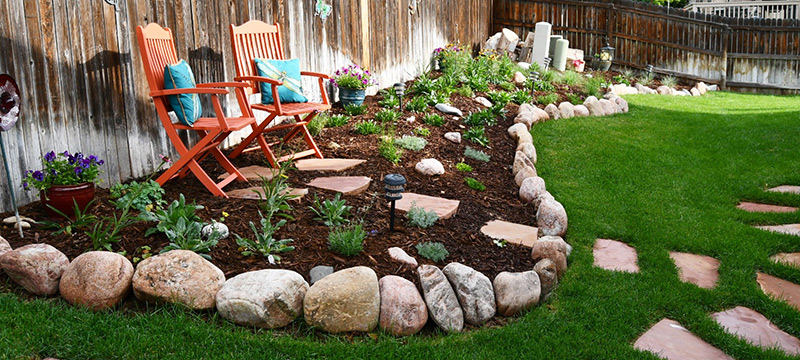
Don’t overlook the backyard! Identify those untouched spots or turn your well-loved backyard into a xeriscape oasis. It’s the perfect conversation starter at your next BBQ. Let the transformation begin!
Irrigation is Key
When choosing the perfect spot, irrigation takes the crown as the ultimate game-changer. If you’re rocking an in-ground irrigation system, here’s the pro tip: eliminate a whole zone for optimal water savings, irrigation pressures, and meeting your plant’s watering needs.
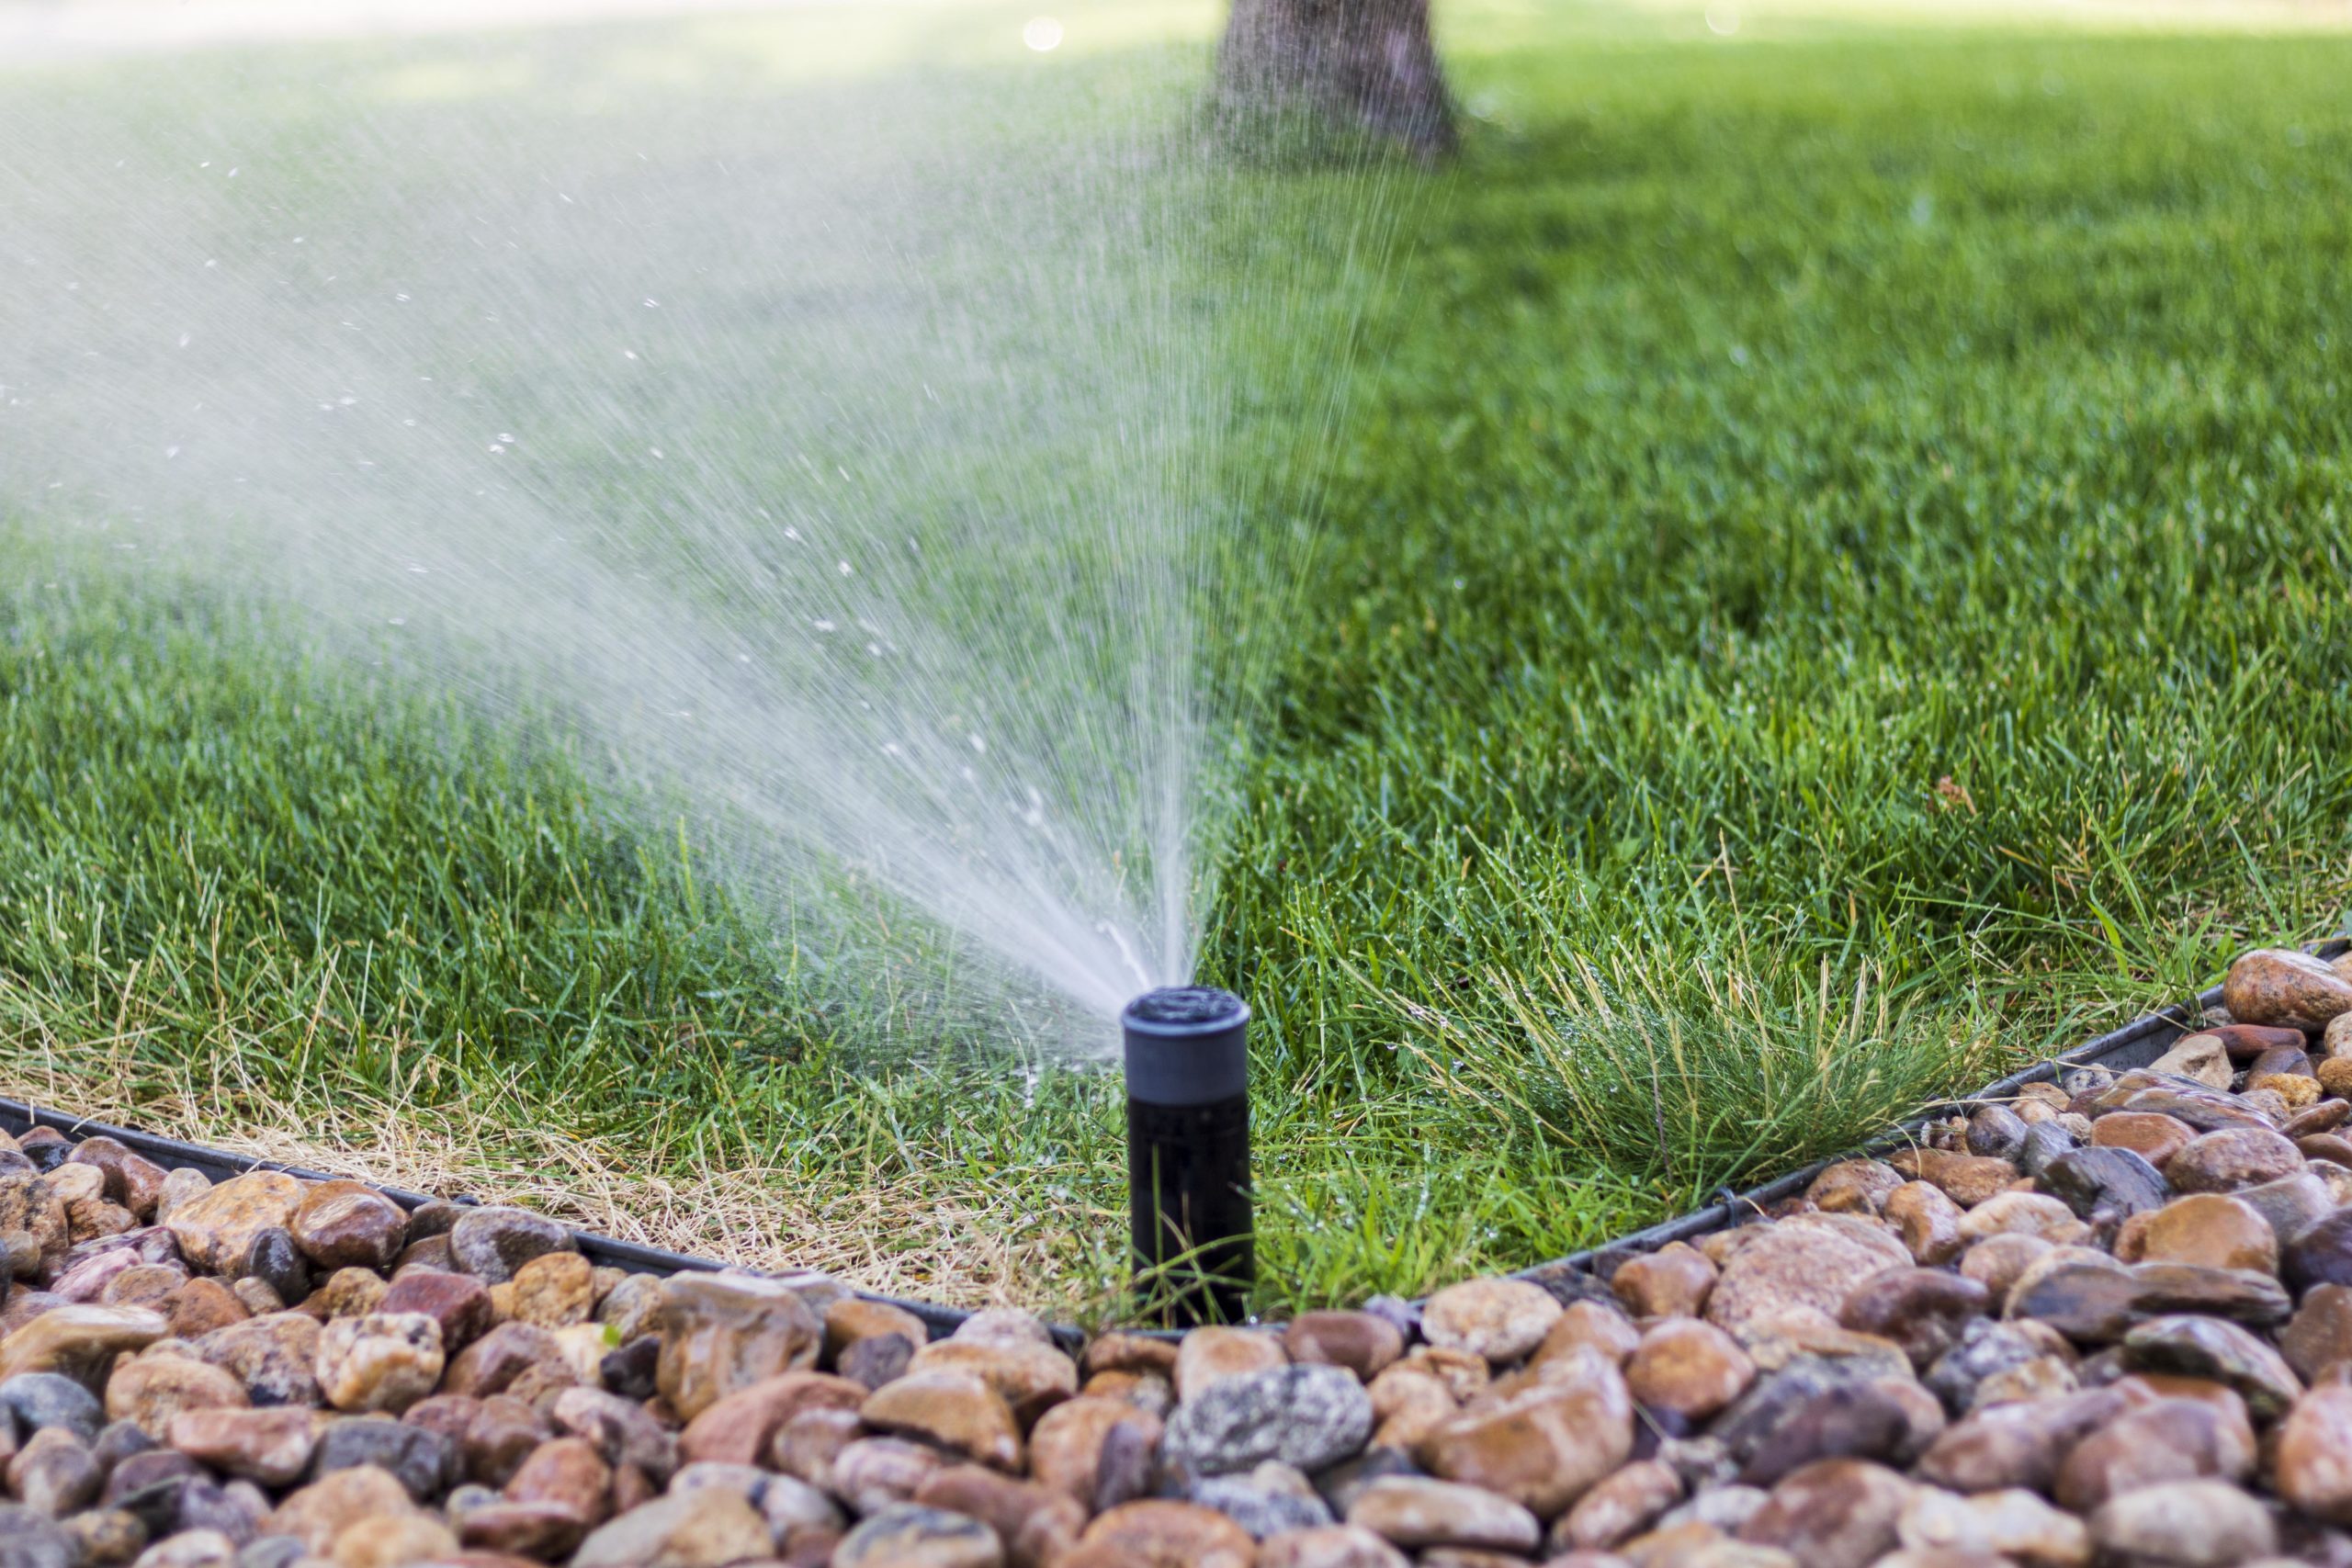
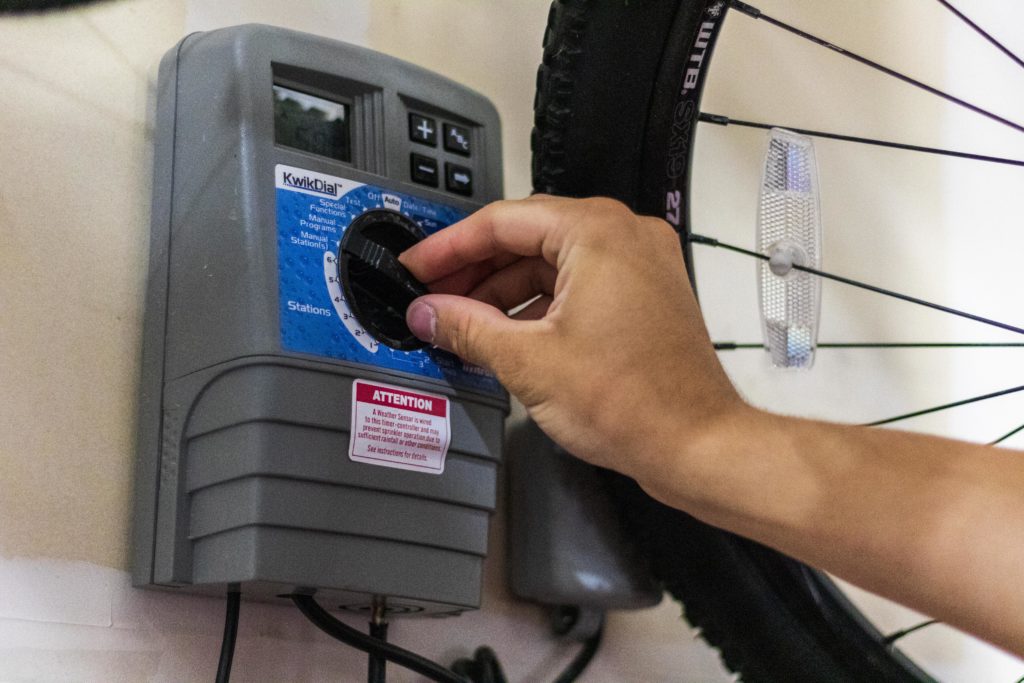
Identifying an irrigation zone is a piece of cake – it’s all the sprinklers that dance together in any given area. To check if your desired area eliminates a whole zone, play detective with your sprinklers. Locate that irrigation control box, run each zone, and ensure the removal area gets its fair share of water.
Here’s the drill: if you see the removal area getting a good soak, mark it down. Make sure all those sprinkler heads doing the tango are strictly INSIDE your removal area. If you see more than one zone making an appearance, cover all your bases by including every WHOLE ZONE in the removal area.
Navigate Obstacles with Ease
In the quest for the ideal removal area, take a moment to survey the lay of the land and dodge potential obstacles. Some spots might be home to trees, shrubs, or perennials with unique watering needs. Before you hit the watering switch, ask yourself: Can these plants thrive with the new watering routine?
Mature trees and shrubs, boasting extensive root systems, often don’t crave extra water. Yet, if they do, you can always provide a helping hand with supplemental drip irrigation. Keep an eye out for slopes, too – anything steeper than 18% is a no-go zone. Beyond 18%, you risk excessive runoff and erosion, leading to more upkeep and water loss. While certain soils might defy the odds, aiming for a relatively level area is your best bet. Smooth sailing ahead!

Project Area Checklist
Before sealing the deal on your space, ensure a responding YES to each of these questions:
- Is this an area not being used by my family, friends, or pets?
- Ensure your chosen area won’t be missed by your loved ones or furry friends.
- Do I have irrigation in this area?
-
- Confirm that the selected space is within the reach of your irrigation system.
- If so, am I eliminating one or more whole irrigation zones?
- Optimize water efficiency by cutting out entire irrigation zones for your selected area.
-
- Can the current vegetation (not including turf) survive on my new watering scheme?
- Check if the existing non-turf vegetation can thrive under the new watering plan.
- Is my area sloped less than 18%?
- Ensure that the slope of your chosen space is less than 18% for a smoother transformation.
A confident YES to all these questions sets the stage for a successful and well-thought-out project. Let the transformation begin!
How to accurately find your project square footage
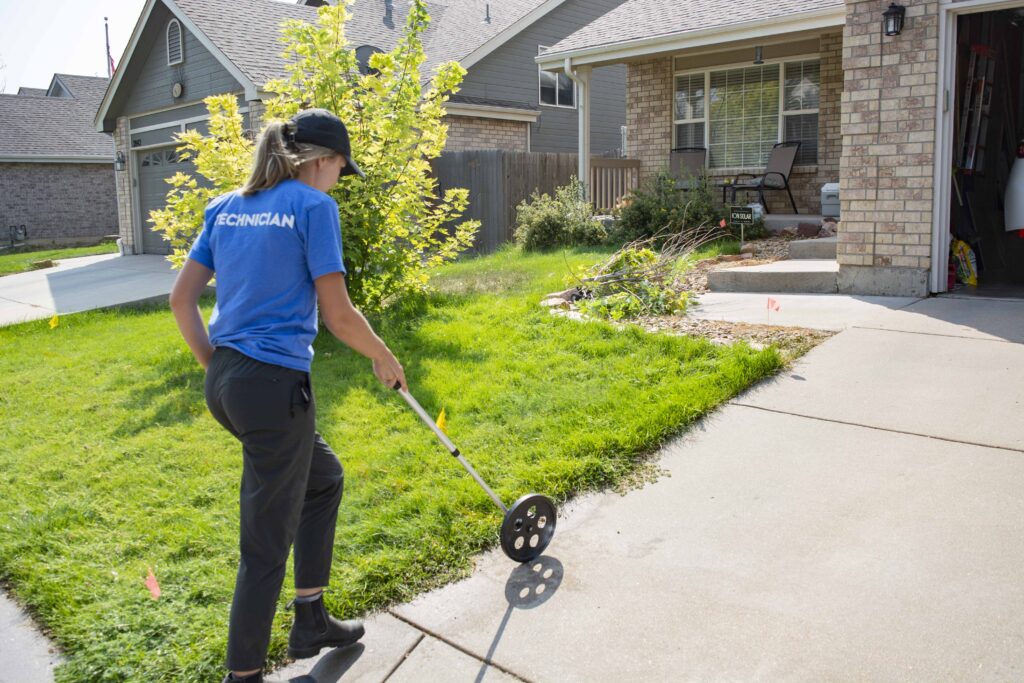
It’s time to get down to the nitty-gritty: calculate the square footage of your project area using an accurate measuring tool, rounded to the whole foot. Why? Because accuracy matters. Your project’s square footage is the key to unlocking the price tag for your upcoming lawn removal venture. Once you’ve nailed those measurements, we’ll crunch the numbers, finalize your quote, and allocate the necessary time and manpower. Efficiency with a side of no-nonsense – that’s how we roll. Let’s make your lawn replacement project a straightforward success.
Accurately Measure Your Space
Achieve precision in measuring your landscaping project space with these straightforward steps using either a tape measure or a hose/string.
Tape Measure Method
- Extend the tape measure along the length or width of your project area, following its contours for accuracy.
- Take note of the measurement at the point where the tape meets the ground, providing an exact dimension.
String Technique
- Outline your project space by laying a hose or string along the perimeters, creating a clear boundary.
- Measure the length of the hose or string using a ruler or tape measure, ensuring accuracy in defining the dimensions.
Square
- Measure one side of the square.
- Multiply that measurement by itself.
- Result: Area = Side x Side
Rectangle
- Measure the length and width.
- Multiply the length by the width.
- Result: Area = Length x Width
Circle
- Measure the radius (distance from center to edge) or diameter (distance across the circle).
- If you have the radius, square it and multiply by π (pi, approximately 3.14).
- If you have the diameter, square it and divide by 4, then multiply by π.
- Result: Area = πr² (or Area = π(d²/4))
Triangle
- Measure the base and height.
- Multiply the base by the height and divide by 2.
- Result: Area = (Base x Height) / 2
Remember to double-check your measurements for accuracy, and you’ll be well-prepared to calculate the area of various project shapes!
Tips for High-Quality Photos
Clear photos of your project space are essential for our Lawn Replacement and DIY programs. In the step of your application, you will need to provide three essential items for a comprehensive assessment. First, submiting a photo capturing the overall condition of the project area. Additionally, you will need to include an image outlining the designated project space, ensuring it is clearly marked. Lastly, you will need to submit a copy of your water bill. These important documents will help us customize our services to meet your needs and ensure the timely completion of your project.
Project Area Photo
When taking and submitting a photo of your project area, it’s essential to ensure the photo is clear and shows the entire project area. Capture the entire project area in the photo by stepping back and taking a clear photo. Please make sure there is no snow present. This helps us accurately assess the quality of your yard and provide precise recommendations for your project. Your cooperation in providing a detailed, snow-free photo is vital for project completion.
Water Bill Photo
To streamline our processes, we kindly ask you to submit a copy of your water bill, confirming your good standing. Please ensure that the copy clearly shows your water provider details and account number. This information is essential for verification, enabling us to proceed with our services efficiently and effectively. Your cooperation in providing this documentation is greatly appreciated and ensures a seamless experience throughout the entire process.
Project Outline Photo
Please submit a photo clearly outlining the project area using ropes, flags, or any markers. When taking this photo, make sure to step back to capture the entire project area within the frame. Alternatively, if you have a smartphone, you can use photo editing tools to draw the outline. On iPhone, select the photo, click “Edit,” then choose “Markup” to draw. For Samsung’s Photo Editor, open the photo, click the pencil icon, choose a drawing tool, draw, and click “Save” when done.
Optional: you can also outline your project area using Google Earth. To outline an area and take a screenshot using Google Earth, follow these simple steps. First, open Google Earth and navigate to the desired location. Then, click on the “Add Placemark” icon, and trace the perimeter of your project area by clicking along its edges. Once outlined, right-click on the placemark, select “Snapshot,” and save the image.
Tips for High-Quality Photos
Clean Your Lenses – Ensure your camera lenses are free from dirt to avoid unfocused and obstructed images. Clean lenses guarantee clarity in your photos.
Avoid Backlit Photos – Steer clear of taking photos with the sun shining from the direction you’re capturing. Optimal lighting enhances visibility, so make sure the sun illuminates your project area from the right angle.
Adjust Camera Position – Hold the camera slightly higher and stand at an appropriate distance to capture the entire project area in your photo. This ensures a comprehensive view.
Take Multiple Shots – Don’t hesitate to snap more photos than needed. Experiment with different distances, angles, and heights. Select the best shot for submission.
Clearly Outline Your Project Area – We require a second photo of your space with the project area clearly outlined. Use ropes, flags, or markers for outlining. Smartphone users can use photo editing tools to “draw” an outline for added clarity. Get creative and showcase your project in the best light!
Sheet Mulching / Lasagna Method
This cost-effective and environmentally conscious approach promises a professionally landscaped result without extensive labor or sod removal. Designed for efficient soil enrichment and home composting, this method ensures a vibrant waterwise garden come summer.
Benefits
Efficiency – Transform your lawn without extensive effort.
Cost-Effective – Achieve a beautiful garden without a hefty price tag.
Minimal Labor – Say goodbye to strenuous tasks; let nature do the work.
Low Environmental Impact – Embrace a sustainable approach to lawn care.
No Sod Removal/Disposal – Skip the hassle of removing or disposing of sod.
Rich Soil – Build nutrient-rich soil for healthier plant growth.
Home Composting – Provide a space for convenient home composting.
Challenges
Slower Process – Takes about 6-8 months, starting in the fall.
Weeds – This method can promote weed growth.
Not for Steep Slopes – Ideal for flat surfaces, not recommended for slopes.
Not for Large Lawns – Best suited for smaller areas, not extensive lawns.
Concerned about newspaper ink? Fear not! Most inks are soy-based and safe for your lawn. Check with your paper provider for peace of mind.
Steps
- Start in the fall. Cut your grass as short as possible. This will ensure that the newspapers or cardboard lay flat in place.
- Spread a 2 inch layer of compost that is high in nitrogen over the area to be replaced. Moisten well.
- Cover the area of lawn that you wish to kill with overlapping cardboard (used boxes will work just fine) or newspaper (10 to 12 sheets thick). Be sure to fully overlap in different directions and that no sunlight can get through, otherwise, the grass will find a way to survive!
- Water the newspaper/cardboard. Be careful not to water too heavily, or the paper may start to tear. You just need it to be wet enough to stay in place and speed up the decomposition process.
- Cover the newspaper/cardboard with another 2 inch layer of compost.
- Top the compost with up to 18 inches of organic materials (grass clippings, leaves, farm manure, straw, food scraps). As time goes on, this pile of organic material will shrink in size, and by spring it will be ready for planting.
- Top it all off with a 4 inch layer of mulch.
- Water the bed occasionally to make for better decomposition.
- Plant in the fall season.
Solarization Method
With this method you will cover the area of grass that you wish to eliminate with a black plastic sheet, creating a sun-powered oven for your grass that is an uninhabitable place for it to live.
Steps
- Begin the solarization process when spring is turning to summer. In Colorado, this is typically in May and early June.
- Cut your grass as short as possible and water it well to prepare the lawn for the process.
- Cover the lawn area that you wish to kill with a black polyethylene sheet (can be purchased at your local hardware store). Hold the sheet in place with heavy rocks or metal stakes. Make sure that the entire area is covered, and that it is airtight with no leaks or holes. The black plastic will act as a trap for the sun’s radiant heat, and it will kill the grass by heating the top 6 inches of soil to about 140 degrees Fahrenheit. You can use a soil thermometer or temperature probe to verify that the soil is heating as desired.
- Depending on the weather, leave in place for 4 to 8 weeks or until the grass is dead.
- Remove the plastic and leave the dead grass to compost.
- At this point, you have three main options:
- Follow the steps (except step 6) for “Sheet Mulching (Lasagna Method)”, and plant right away (not next spring).
- Depending on how long it has taken to kill the grass and how much time is left in the growing season – you can begin planting right away, but be sure not to cultivate any soil that is deeper than 2 inches! It is possible that weed seeds at deeper levels will surface and grow.
- Wait until next year to plant.
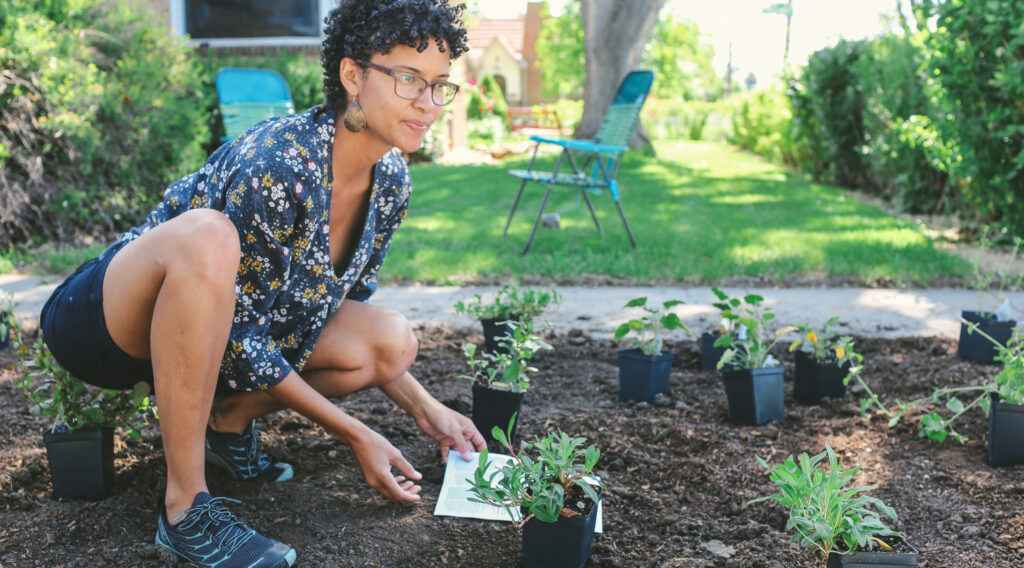
Benefits
Efficiency – Transform your lawn without extensive effort.
Cost-Effective – Achieve a beautiful garden without a hefty price tag.
Minimal Labor – Say goodbye to strenuous tasks; let nature do the work.
Low Environmental Impact – Embrace a sustainable approach to lawn care.
No Sod Removal/Disposal – Skip the hassle of removing or disposing of sod.
Composting – Can create compost from your dead grass
Sunny Areas – Good for hot, sunny areas.
Challenges
Really Slow Process – Can take anywhere from 6 weeks to a year to fully kill your grass.
Unsightly – May have the neighbors wondering when the painting is going to begin.
Not for Steep Slopes – Ideal for flat surfaces, not recommended for slopes.
Shade Areas – Does not work in cool, shady areas.
Physical Removal
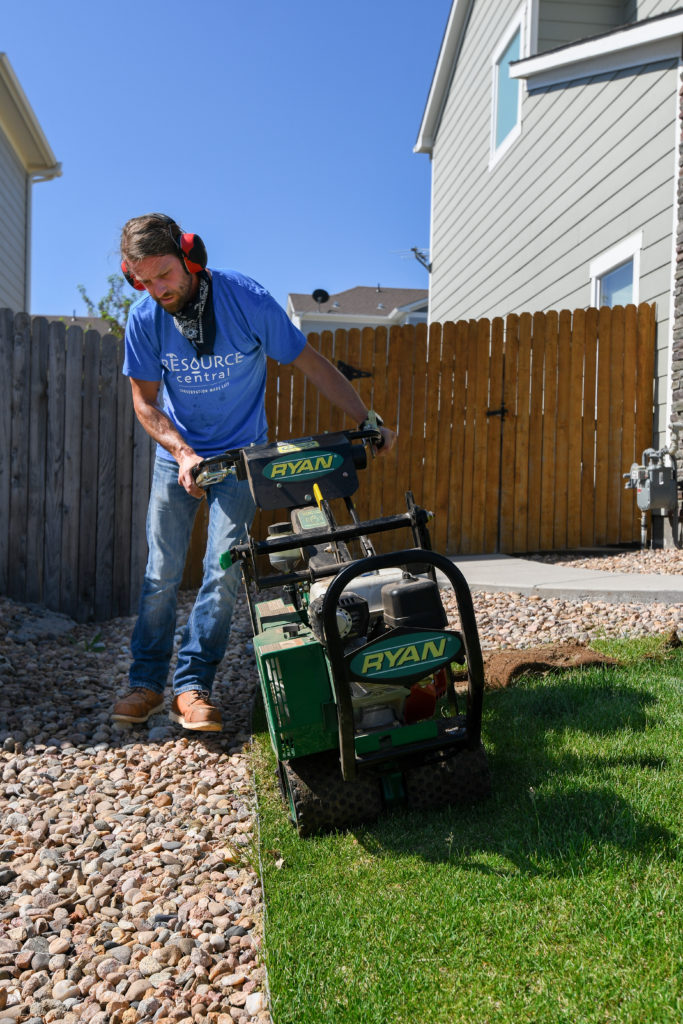
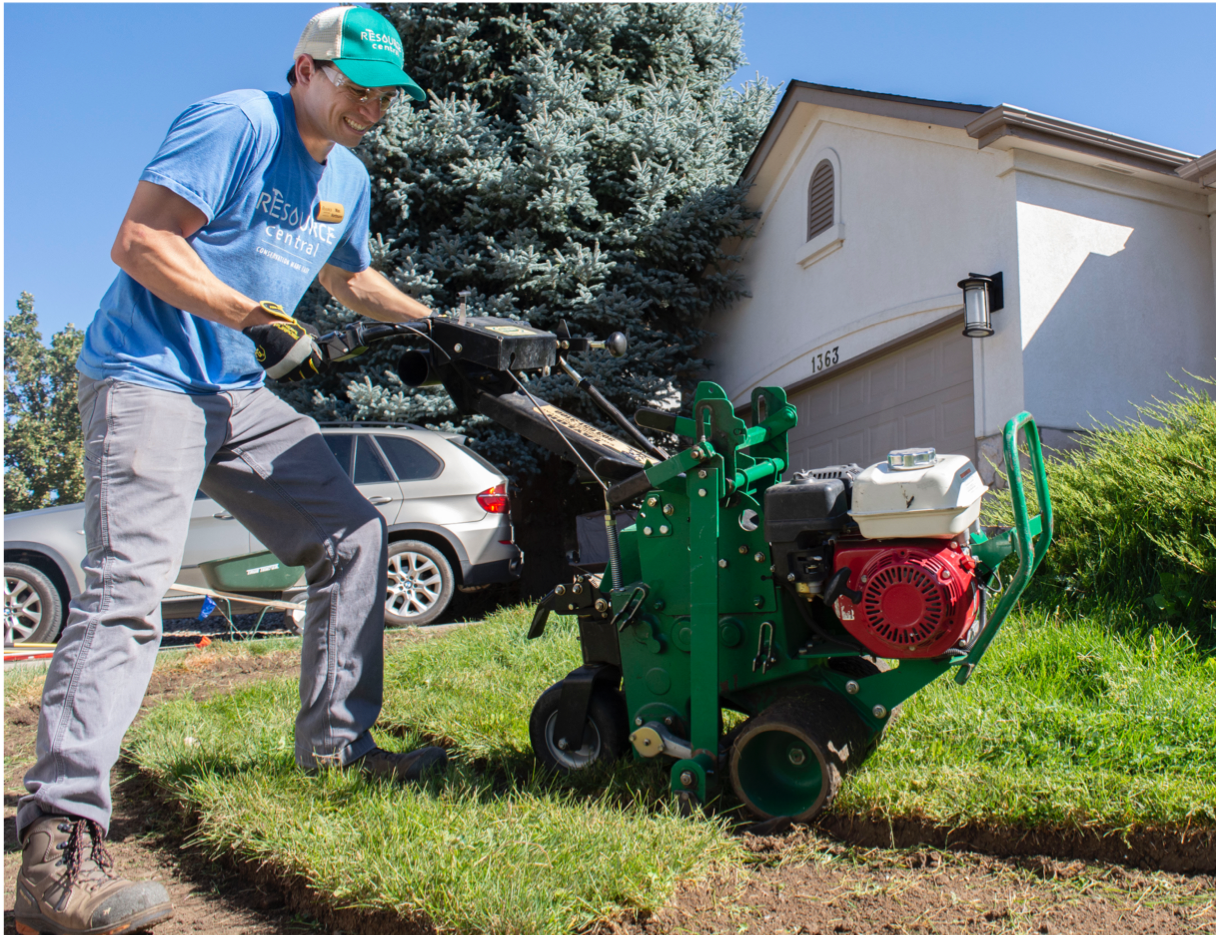
This is a method of physically removing your lawn with a sod cutter or manually with a square shovel or grape grubbing hoe.
Benefits
Quick – Fastest way to remove lawn
Compost – The removed sod makes great compost
Top Soil – Leaves the majority of your soil intact
Get Fit – If you’re doing it manually, you’ll get a good workout
Large Areas – Good for areas greater than 100 square feet
Challenges
It’s a Workout- Very labor-intensive.
Regrowth – Higher chance of grass regrowth than other methods – sometimes roots and grass clipping will resprout.
Deep Roots – Will not work for long rooted grasses such a Bermuda Grass – the sod cutter does not remove the roots that reach several feet below the surface.
Rentals – If you use a sod cutter, this will require a piece of machinery that you likely do not own.
Steps
- Based on the size of the lawn area that you want to remove, decide whether you want to use a sod cutter or a square shovel/grape grubbing hoe. On average, two people can manually remove and haul away 100 square feet of lawn in an hour. If you do not own a sod cutter, and that is the way that you would like to go, then rent one from your local tool supplier.
- Sod cutter – Once you get your hands on a sod cutter, you will simply cut your sod into strips, roll them up, and get rid of them.
- Shovel or hoe – The same steps apply: Dig it up and move it out! Make sure you dig deeply enough to remove the roots – root depth will vary from yard to yard. Getting a friend or neighbor to help you out is highly encouraged.
- Add some compost to your new garden area and get your garden ready for planting. You may want to consider Solarizing (see “Solarization” section) the area to make sure to kill any weeds that may remain in the soil.
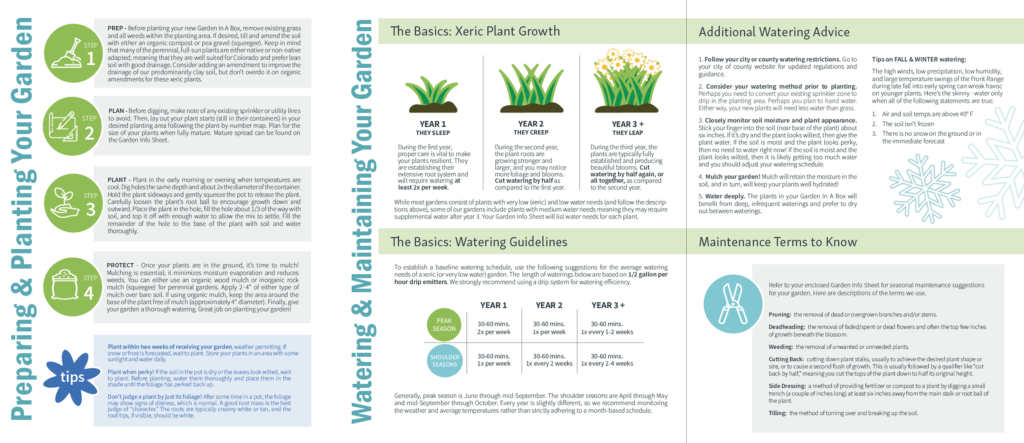
Planting 101
Unlock the secrets of successful planting with our concise guide! From selecting the right plants to mastering essential techniques, we’ve got you covered. Whether you’re a novice or a seasoned gardener, dive into the art of planting and cultivate a thriving garden. Start your planting journey today for a greener, more vibrant space!
Native Plant List
Native Plant List
Learn more about various low-water native plants for Colorado’s Front Range. View the publication from CSU extension below!
Garden In A Box
GIAB Selection
Learn more about various low-water plants from our garden store. Learn more and purchase gardens at Resource Central’s Garden Store
Native Grass
Explore the diverse world of grasses to elevate your landscaping experience! Whether used as striking individual specimens or grouped together for ornamental beauty, bunchgrasses offer a range of aesthetic possibilities. Opt for sod-forming grasses to create a low-maintenance turf, delivering savings in mowing, fertilizing, and irrigation. The advantages extend beyond visual appeal, as grasses play a pivotal role in nurturing a thriving ecosystem by providing excellent forage and cover for birds and beneficial insects. Uncover the versatile benefits that grasses bring to your garden, enriching both the visual and ecological aspects of your outdoor space.
Buffalograss Characteristics
Buffalograss, a native species, displays unique attributes that make it well-suited for specific environments. Thriving on clay soils and requiring full sun (at least 6 hours daily), Buffalograss boasts a water-efficient nature, needing irrigation only once a week— a significant reduction compared to other grass types. With a short stature of 3-6 inches, it serves as an excellent choice for lawn replacement, requiring minimal mowing (1-3 times per summer). While it has runners and can be utilized in medium-traffic areas, Buffalograss is not recommended for high-traffic locations. Its adaptability extends up to elevations of 6,800 feet, and it maintains a lush green color from May to October.
Blue Grama Characteristics
Another native grass, Blue Grama Grass, offers a different set of characteristics suitable for diverse landscapes. Adaptable to various soils, Blue Grama Grass requires full sun, thriving with over 6 hours of sunlight per day. With a height range of 6-18 inches, it demands minimal watering, typically once a week or even less. Flowering in August and undergoing seasonal changes, including turning blonde in winter, Blue Grama Grass offers aesthetic diversity. It can be planted up to 7,500 feet in elevation, making it suitable for higher locations than Buffalograss. While it requires occasional mowing, it is best for low-traffic areas, making it an ideal choice for large, low-use spaces. Blue Grama Grass is particularly well-suited for naturalistic landscapes, informal designs, and hot, dry, sunny areas.
Grass List
Grass List
Learn more about various low-water native grass by view the publication from CSU extension below!
Application of Native Grass Seed
For a successful installation, start by clearing existing weeds and grass. The optimal planting window is from June 1 to August 15, ensuring the grasses are at their most active. Overseeding existing grass, weeds, or bare ground is not recommended for success. Depending on the condition of the existing grass, either mow short, core aerate, and plant into dead grass if it’s growing well, or opt for lawn removal and rototilling if it’s not thriving. Rototilling helps break up soil compaction, and mixing dead weeds and grass with the soil is advised for optimal results. Smooth the soil surface, fine-tune the final soil grade, and roll to create a firm seedbed if necessary. When planting Buffalograss, use plugs spaced 12-18 inches apart, as growing from seeds and plugs can be challenging. Buffalograss consists only of female heads, and using a pre-emergent herbicide with plugs until they fill in is recommended. Avoid using pre-emergent herbicides like “Barricade” with Buffalograss. While native grass sod is challenging to transport, expensive, and difficult to find, seed varieties of turf grass cultivars are considered best for residential purposes.
Seeding
For successful seeding, evenly spread the seed into the soil and carefully rake it in. Ensure regular watering throughout two growing seasons to establish the seeds, and adjust the watering regimen based on their needs thereafter. Promote rapid growth by fertilizing with standard lawn fertilizer at half the recommended rate, applied up to once per week. For weed control it is recommended to hand pull and manually remove weeds in your yard. However, Carfentrazone (Quicksilver) for broadleaf weeds, and Quinclorac (Drive) or mesotrione (Tenacity) for grassy weeds, are suitable for both buffalograss and blue grama. These species can be planted separately or together.
In long-term maintenance, fertilize once per year with 1 lb of nitrogen per 1,000 square feet. Water once the grass greens up in May, providing one half-inch of water every 7-14 days; winter watering is not required. Mow when the grass reaches 3+ inches tall, typically in February to remove dead material, with only 1-4 mowings needed throughout the year. Be cautious with blue grama, as frequent mowing and excessive watering may lead to increased weed growth.
Planting a Tree or Shrub?
- Choose the Right Tree/Shrub: Select a species suitable for your climate and elevation.
- Dig the Hole: Dig a hole twice as wide as the root ball and at the same depth. Ensure the top of the root ball sits slightly above the soil line.
- Prepare the Tree/Srub: Gently remove the plant from its container, loosening any encircling roots. Place it in the center of the hole.
- If your plant has a basket make sure to cut the top half of the wire basket and push it down to the base of the whole. This will allow for adequate root growth.
- Backfill the Hole: Fill the hole with a mix of native soil and organic matter. Tamp down the soil to remove air pockets. This is key for the plants survival.
- Mixing in some Nutra Mulch is a great way add some organic material along side your root ball.
- Water Thoroughly: Water the tree generously after planting to settle the soil and provide initial moisture.
- Apply Mulch: Mulch around the base of the plant to retain moisture, regulate soil temperature, and suppress weeds.
- Choose a Suitable Location: Plant the tree/srub in a location with adequate sunlight and consider its growth requirements.
- Provide Ongoing Care: Water regularly, especially during the initial establishment period. Monitor for pests and diseases, and adjust care accordingly.
Tree and Shrub Needs

Section Overview
Achieving a healthy garden starts with an effective substrate that promotes proper air and water exchange. Say goodbye to unnecessary landscape fabrics and plastics that may hinder plant growth. Tailor your mulching approach based on your specific goals, whether it’s enhancing soil quality or focusing on moisture retention and visual appeal. We’ve got recommendations to guide you in choosing the right mulch and applying it at the optimal depth.
Quick Recommendations
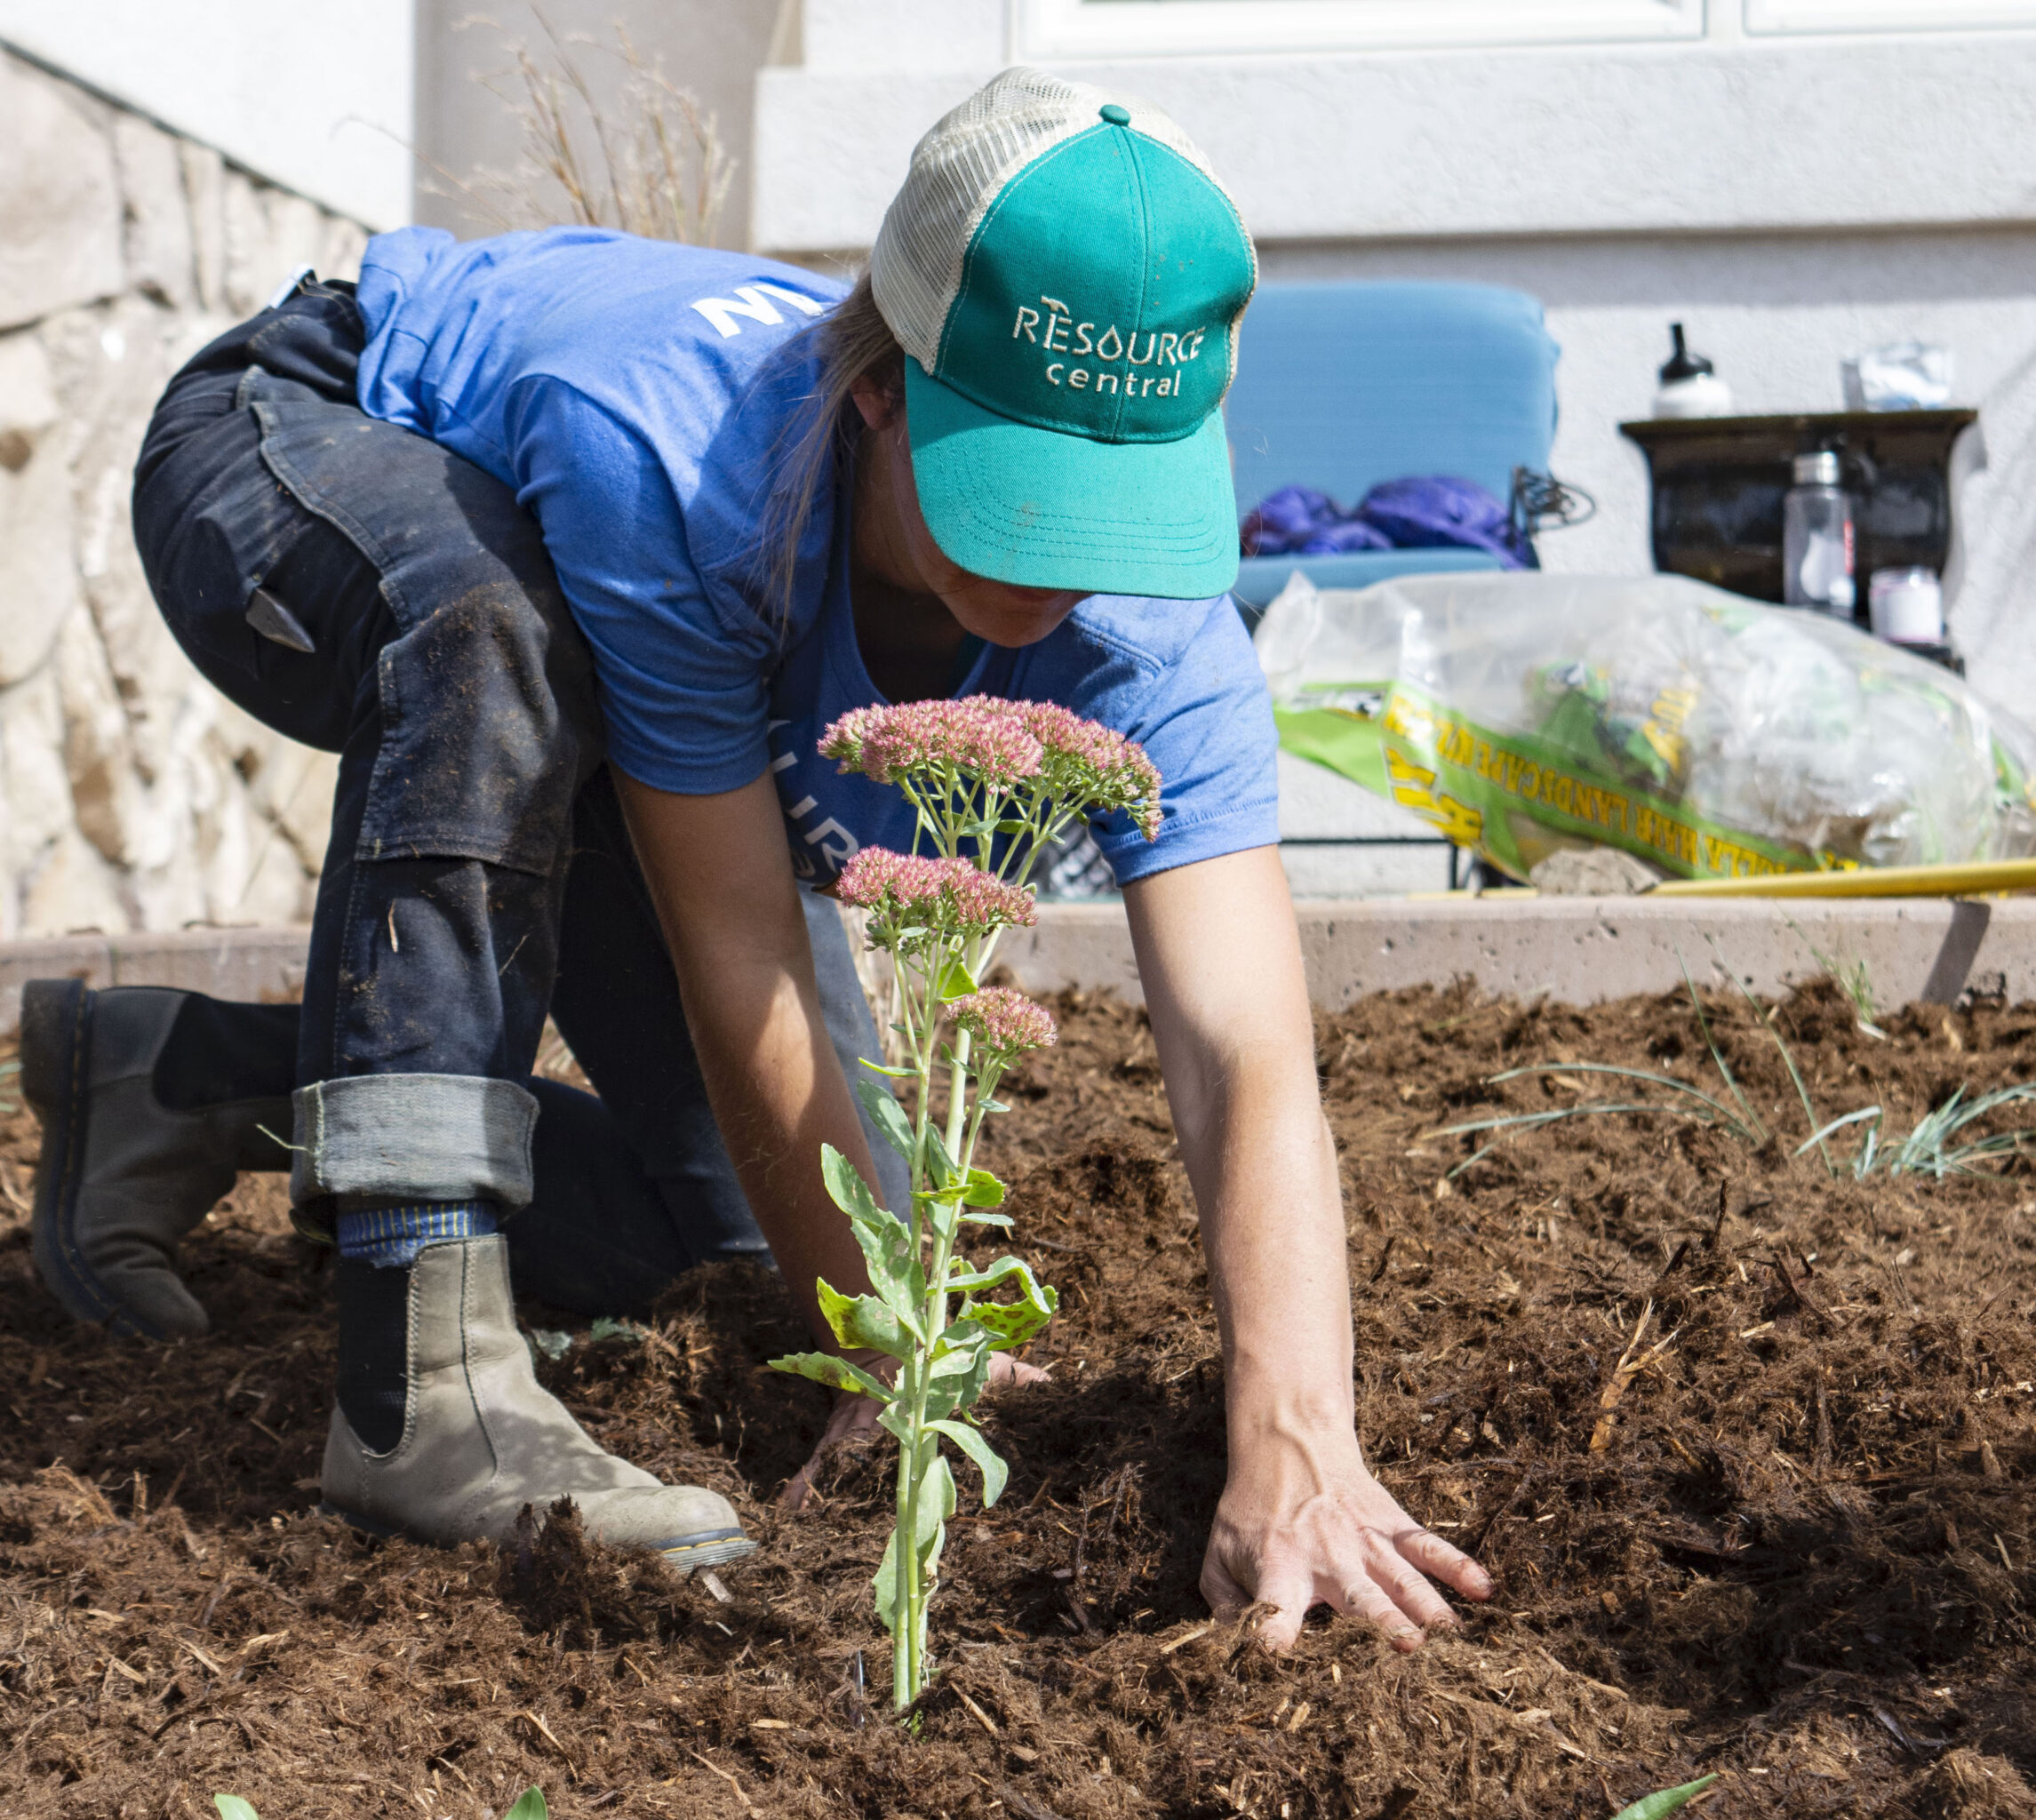
When deciding on the right mulch for your space, consider your specific goals to tailor your approach. If your aim is to enhance soil quality, opt for organic mulch. For annual flowers, a temporary organic mulch that can be incorporated each fall is recommended. Trees, shrubs, and perennials thrive with wood chips and inorganic mulches. For those focused on easier weed mitigation and visual appeal, inorganic mulch is the ideal choice. Remember to reapply organic mulches once they begin to break down, maintaining an appropriate depth of 3-4 inches, depending on the mulch type.
Be cautious not to over-mulch, as excessive depth can impede water and air access to the soil. The timing of reapplication in the cold season is determined by your goals; for fall transplants, apply immediately after planting to prolong soil temperatures above freezing, fostering better root growth. If your objective is to mitigate frost heave and delay spring growth, apply mulch after the ground has frozen.
Organic Mulch
Organic mulch is ideal for ensuring optimal moisture retention and soil health around trees and shrubs, particularly in part-shade locations, and is best for medium to high water need perennials or annuals. Reapply the mulch when it begins to break down, maintaining a depth of 3-4 inches based on the type of mulch. Be cautious not to over-mulch, as excessive depth can impede water and air access to the soil. This practice is particularly beneficial for medium to high water need perennials or annuals. The timing of reapplication is crucial and depends on your specific gardening goals. For fall transplants and cool season application, apply the mulch immediately after planting to extend soil temperatures above freezing, fostering better root growth. If your aim is to mitigate frost heave and delay spring growth, apply the mulch after the ground has frozen.
Organic Mulch Types
Wood Chips and Bark Chips
Applied at least 4 inches deep, wood chips and bark chips offer a natural and enriching layer to your garden beds.
Wood Chips (Standard Mulch)
A cost-effective but shorter-term option, woodchips include bark, wood, and leaves. Rich in lignin, suberin, and tannins, they may look worn quickly and pose a fire risk. However, standard mulch can provide nutrients and help absorb water.
Shredded Bark Mulch
Composed of smaller pieces, shredded bark mulch is affordable, less likely to wash away, and gradually decomposes. However, it may absorb nitrogen, requiring supplementation with fertilizer.
Dyed Mulch (Not Recommended)
Crafted from recycled wood waste and sprayed for uniform color, dyed mulch doesn’t break down to enrich the soil like regular organic mulch. It may leach dye and contaminants, potentially harming soil life and young plants.
Grass Clippings
For a sustainable option, apply grass clippings in thin layers with intervals for drying. However, caution against deeper applications to prevent mold formation.
Straw
An excellent weed suppressant, straw adds organic matter to the soil. Keep in mind that it requires annual reapplication to maintain its effectiveness.
Pine Straw Mulch
Derived from pine needles, this cost-effective option is ideal for filtering water and insulating the ground. It’s particularly suitable for plants that prefer acidic soil.
Compost Mulch
Providing simultaneous fertilization and weed control, compost mulch requires frequent replenishing due to its quick decomposition.
Leaf Litter Mulch
Enrich your soil and protect plants during winter with leaf litter mulch. Remember to shred leaves before application.
Sawdust Mulch
With its high carbon content, sawdust mulch is best combined with other materials to improve water penetration. It’s beneficial for acidic plants but may be detrimental to other plants such as roses.

Inorganic Mulch
Consider the durability and aesthetic appeal of rocks and gravel as an inorganic mulch option for your garden. Applying them at least 2-3 inches deep, these materials excel in windy spots and boast longevity, requiring rare replacement. Optimal results are achieved with rocks less than half an inch in diameter, as they effectively control weeds, retain water, prevent soil compaction, and remain steadfast against wind, offering a low-maintenance solution to enhance the overall health of your landscaping.
Inorganic Mulch Types
Pea Gravel
Pea gravel not only enhances water filtration in the soil, especially during short, intense rain events, but also acts as an effective weed barrier. Its ability to transfer more heat to the underlying soil than wood chip mulch can contribute to better overall plant health during winter. Available in various shades and mixtures, pea gravel can be a versatile choice for your landscaping needs.
Crushed Marble (Calcium Carbonate)
Ideal for protecting plant roots, crushed marble is recommended for plants that can withstand hot temperatures. However, its high pH balance can leach into the soil, making it unsuitable for plants that require acidic conditions.
Mexican Beach Pebble
Round and available in dark colors, Mexican beach pebbles add a touch of elegance to landscaping. Made of volcanic basalt, these pebbles can be relatively expensive but offer a multi-toned aesthetic.
Natural Decomposed Granite
An excellent non-organic mulch, natural decomposed granite weathers over time, providing ongoing nutrients to the soil. It is the least expensive type with no extra additives, offering permeability and excellent drainage.
Stabilized Decomposed Granite
Although more costly than natural decomposed granite, stabilized decomposed granite remains an affordable option. With added stabilizers binding granite aggregates, it is more stable, less prone to erosion, longer-lasting, and requires less maintenance.
Smooth River Rocks
Low-maintenance, durable, and long-lasting, smooth river rocks are useful for flower beds and erosion control. However, they may not be effective at weed prevention unless a weed barrier is in place, which is generally not recommended for areas where you are trying to grow plants.
Brick Chips
Inexpensive and suitable for landscaping paths, brick chips require heavy-grade landscape fabric (not recommended) to prevent weeds and sinking into the soil. They provide passive heating at night, absorbing water quickly due to their porous nature while facilitating easy water flow into the soil.
Lava Rocks
Expensive but beneficial for regulating soil temperature and retaining water due to their volcanic properties, lava rocks are ideal for use in drier climates. They absorb heat during the day and release it at night.
Need more mulch information?
Visit CSU Extension
Learn more about various low-water xeriscaping and gardening tips. Click below to explore more options and tips/tricks for xeriscaping at CSU Extension!
Dip Kit and Conversion
Discover essential drip irrigation insights in this section, whether or not you choose the Rain Bird Drip Conversion Kit. Explore basics, benefits, and step-by-step guidance for a seamless transition. Enhance your watering system with key insights for a more efficient landscape. Note: We offer a complimentary optional kit when you participate in our Lawn Replacement program and elect to receive gardens, making the transition to drip irrigation seamless.
Drip Conversion Head
What we Offer!
When joing our program you have the option to receive a complementary RainBird drip conversion head. This will allow you to start your drip conversion process.
It's Easy!
Follow the Steps
If you receive one of these kits, follow the steps located here for accurate conversion. If you have more questions on the drip kit please book a consultation!
Steps
Remember to follow any local regulations and guidelines when modifying your irrigation system. Additionally, always turn off the water supply to that zone before making any changes to the irrigation system.
- Locate an Optimal Position:
- Identify an optimal location for a new irrigation head to ensure coverage for all your plants.
- Make sure you are converting a whole irrigation zone!
- Drip Conversion Kit Placement:
- Determine whether the drip conversion kit should be installed in the original head casing or at the PVC fitting. This may depend on the specific type of conversion kit you have.
- Install Drip Conversion Kit’s Internal Filter:
- If necessary, install the drip conversion kit’s internal filter. This may involve unscrewing the existing head or replacing the entire head with the one provided in the conversion kit.
- Locate Other Heads in the Irrigation Zone:
- Identify all the other irrigation heads in the same zone. This is important for making sure you cover the entire area efficiently.
- Dig Up and Cap Other Heads:
- Carefully dig up the soil around the other irrigation heads in that zone.
- Cap the unused heads at the fitting or casing. Use appropriate caps or plugs designed for irrigation systems. This step is essential to redirect water flow to the new drip system.
- Adjust and Test:
- Adjust the new irrigation head to ensure proper coverage of all plants.
- Test the system to make sure the water is distributed evenly, and there are no leaks.
- Consider Professional Assistance:
- If you’re unsure about any step or if your irrigation system is complex, consider consulting with a professional irrigation specialist for guidance or assistance.
Thornton Water Conservation – “Converting Your Sprinkler to a Drip Zone – An H2Overhaul Production”
Sprinkler Warehouse – “Rain Bird Pop-up Sprinkler to Drip Conversion”
Drip Irrigation Conversion
Welcome to the lawn replacement program irrigation conversion how-to section. Here, we will walk you through the four main types of drip irrigation systems. If you have questions about terms or need guidance on installing a drip conversion kit, please refer to the provided sections in the tab group above. Note: We offer a complimentary optional kit when you participate in our Lawn Replacement program and elect to receive gardens, making the transition to drip irrigation seamless.
General Steps for All Systems (Except Soaker Hose Setups)
Conversion: Convert your pre-existing irrigation zone into a drip zone. This can be done using a drip conversion kit or by converting a whole zone from a valve (see drip conversion video below).
Installation: Install the desired drip system from the conversion or outlet point. Ensure proper sealing (via an end cap or other method) at the end of the line to prevent water leakage. Make sure to stake down your line every couple feet to ensure a good flow of water and make it more aesthetically pleasing.
Adjust Watering Needs: Adjust your irrigation clock to the desired runtime for your new drip irrigation zone. Make sure to blow out or winterize your system to ensure year over year operation.
Once you have converted your existing irrigation zone into a drip irrigation setup, you can choose from the options below, where we outline the four main types of drip irrigation.
Thornton Water Conservation – “Converting Your Sprinkler to a Drip Zone – An H2Overhaul Production”
Sprinkler Warehouse – “Rain Bird Pop-up Sprinkler to Drip Conversion”
Soaker Hose

Pros:
- Easy installation and adjustment.
- Suitable for areas without in-ground irrigation systems.
- Manual control available at the spigot.
Cons:
- Limited water savings compared to other options.
- Difficult to create point source watering.
- May not meet specific watering needs of plants.
Items Needed:
- Outdoor Water Spigot
- Soaker Hose
- Outdoor spigot timer/clock (optional)
Steps
Location Identification: Identify the location for your new drip zone within your landscape.
Soaker Hose Selection: Obtain a soaker hose that fits the appropriate space in your landscape.
Smart Controller (Optional): Optionally, acquire a smart controller that can be attached to a spigot or hose fitting for automated watering control.
Installation: Run the soaker hose through your xeriscape project, ensuring comprehensive coverage between plants. Ensure the hose is weaved around all plants in the area, covering the space between them.
Testing: Test the system to ensure you do not have any leaks or unwanted watering.
Substrate Application: Apply substrate to cover the soaker hose. During winter, detach the hose from the spigot for winterization.

Point Source Drip
Steps
Poly Drip Line Installation: Run a (¾ or ½ inch) poly drip line from the conversion head or valve throughout the desired planting area. Ensure the line is located optimally, running through the center of your xeriscape projects or staked/teed around the main sections.
Emitter Installation: Identify and install emitters based on the watering needs of each type of low water plant. Use a puncture tool to insert the desired gallons per hour emitter into the main lateral poly drip line.
Tubing Attachment: Run quarter-inch tubing (spaghetti pipe) from the main lateral poly line via the emitter that was attached to the base of each plant. Secure the tubing with landscape pins or staples.
Testing: Perform a test to ensure there are no leaks in the system. Run the system to check for proper watering coverage.
Substrate Application: Apply substrate to cover the drip line.


Pros
- Most effective in water savings.
- Highly customizable for different plant needs.
- Can accommodate low water plants and trees.
- Drips water directly at the base of each plant.
Cons:
- Labor-intensive installation.
- Can be expensive due to numerous parts required.
- Requires detailed knowledge of plant watering needs.
Items Needed:
- In ground Irrigation system
- Drip Conversion Kit or Valve Conversion Set-up
- ¾ or ½ inch poly drip pipe
- Various Fittings for Pipe Angles (including end cap)
- GPH Emitters
- ¼ drip tubing (spaghetti pipe)
- Lawn Stakes or Staples
Micro Spray Emitters

Pros
- Customizable and suitable for larger areas.
- Ideal for vegetable or herb gardens.
Cons:
- Complex installation process.
- Higher maintenance required. Due to nozzle adjustment and possible weed growth.
- Generalized watering may not meet specific plant requirements.
Items Needed:
- In ground Irrigation system
- Drip Conversion Kit or Valve Conversion Set-up
- ¾ or ½ inch poly drip pipe
- Various Fittings for Pipe Angles (including end cap)
- Micro Spray emitters/jet stand stakes
- ¼ drip tubing (spaghetti pipe)
- Lawn Stakes or Staples
Steps
Poly Drip Line Installation: Run a (¾ or ½ inch) poly drip line from the conversion head or valve throughout the desired planting area. Ensure the line is located optimally, running through the center of your xeriscape projects or staked/teed around the main sections.
Emitter Installation: Install the emitters through-flow that come attached or provided with the micro spray emitter you selected. Use a puncture tool to insert the flow-through emitter into the main lateral poly drip line.
Tubing Attachment: Run quarter-inch tubing (spaghetti pipe) from the main lateral poly line via the emitter that was attached to the base of each plant. Secure the tubing with landscape pins or staples.
Micro Spray Positioning: Stake the micro emitter between your plants to allow proper coverage of all your plants requiring this watering type (if you selected adjustable spray emitters adjust the flow rate by screwing/unscrewing the nozzle on the top or side of the micro spray).
Testing: Perform a test to ensure there are no leaks in the system. Run the system to check for proper watering coverage.
Substrate Application: Apply substrate to cover the drip line.

Netafim or Pre-Punctured Drip Line
Steps
Fitting Attachment: Attach appropriate fittings to the drip conversion setup based on the pipe size and type you selected.
Drip Line Connection: Connect the netafim or pre-punctured drip line to the drip conversion setup.
Pipe Routing: Run the pre-puncture drip pipe between all plants, ensuring comprehensive coverage. Zigzag the line and cover both sides of all plants.
End Cap Application: Cap the end of the line to prevent water flow, ensuring proper pressurization in the drip converted area.


Pros
- Predesigned system with various budget options.
- Easy installation once converted to drip setup.
Cons:
- Limited water savings compared to other options.
- Hard to create point source watering.
- May not meet specific watering needs of plants.
Items Needed:
- In ground Irrigation system
- Drip Conversion Kit or Valve Conversion Set-up
- Pre-Punctured Drip line (various spacing and sizes available)
- Various Fittings for Pipe Angles (including end cap)
- Lawn Stakes or Staples
Become an Irrigation Expert
In this section, we’re diving into the fantastic world of irrigation conversion lingo, unraveling the mysteries behind the common terms that make water flow throughout your yard. Note: not all terminology and techniques will be listed in this section. This is just an overview for the average homeowner.
Drip System – The use of plastic piping to transport low quantities and flows of water throughout an irrigation zone.
Control Clock – A timer or fixed based controller that turns your irrigation on or off.
Spray Head – A type of irrigation sprinkler that has a “spray” patern and is typically used in small sections of lawn and gardens. This head disperses the same amount of water, at the same time evenly over it area.
Multi-Strand Wire – A group of individually colored wires used to connect a Control clock to a valve. The typically have 6-24 wires in a strand.
Common Wire – This is one single wire that runs from your control box to all the valves in your system. This wire cares the power or a small electric charge to each valve. The common wire is typically white in color.
Polyvinyl Chloride (PVC) Pipe – A type of thick plastic irrigation pipe that comes in diameter sizes of 1/2″-12″. PVC pipe is used for in ground mainlines and sometime lateral lines. It is typically not used for drip irrigation due to freezing and cracking in the winter months.
Mirco-emitters / Emitter Stands – Like standard drip emitters, these are used to control the flow of water from your lateral line to the plant. This are typically attached at the end of the spaghetti pipe. The usually have an adjustable mister top that can turned up or down to control water flow. Some emitter stands are fixed at a certain spray pattern and or gph.
End Caps – These are parts used to stop the path of your lateral lines. They come in different shapes and sizes. You will want to match the diameter of the fitting with the diameter of pipe you are using. These will keep the flow of water inside your system when you are at the end of your lateral line.
Threaded Caps – Small PVC caps used for eliminating heads and stoping flow of water when threaded fitting or pipes are present. They come in a variety of sizes, typically for drip irrigation you will need either a 1/2″ or 3/4″ cap.
Head Caps – Plastic caps used for eliminating heads and stoping flow of water at the top of our current irrigation head. They come in a variety of sizes and brands. You will want to find the same brand head cap as the irrigation head you are caping.
Irrigation Zone – The section of your in ground irrigation that runs at the same time when toggled on by a control clock or valve.
Rotor Head – A type of irrigation sprinkler that has a “single stream” patern and is typically used in larger sections of lawn. This head rotates back and forth with a steady stream to cover an area evenly.
Single Strand Wire – A set of individual wires used to connect a Control clock to a valve. Single stand wires are usually all one color.
Zone Wire – This is one single wire that runs from your control box directly to the valve you are turning on. Zone wires are typically different colors in multi-strand wires or labeled with single stand wires.
Irrigation Valve – A device that automatically starts and stops the control of water using an electric current provided by the control clock.
Lateral Line – A section of irrigation pipe that does not constantly have flowing water through it. It will be connected to the main line in some fashion usually after a valve.
Polyethylene (poly) Pipe – A type of plastic irrigation pipe that is flexible and comes in diameter sizes of 1/2″-6″. For drip irrigation most poly pipes are 1/2″-1″ in diameter. Its light weight construction is ideal for attaching drip emitters and leaving above ground.
Micro / Spaghetti Pipe – A type of plastic irrigation pipe that is flexible and comes in diameter sizes of 1/4″. This pipe is used to connect from your lateral line to your plant base. Some systems use a type of emitter before or after this connection point.
Drip Filter –A filter used to catch debris so your emitters do not get clogged.
Drip Emitters – A small circular connector that typically connects spaghetti line to your poly lateral line. Most drip emitters have a set flow rate represented in gallons per hour (gph). They can range from 0.5gph-6gph.
Irrigation Fittings – These are joints/parts that are used to alter the path of your lateral lines. They come in different shapes and sizes. You will want to match the diameter of the fitting with the diameter of pipe you are using. A common fitting used is a 3/4″ x 90 elbow (a right angle fitting for 3/4″ pipe).
What If I Get Rejected?
Reason for rejection
If your project has been rejected from our program, it is due to your lawn’s quality or your project plan (view more about our requirements below).
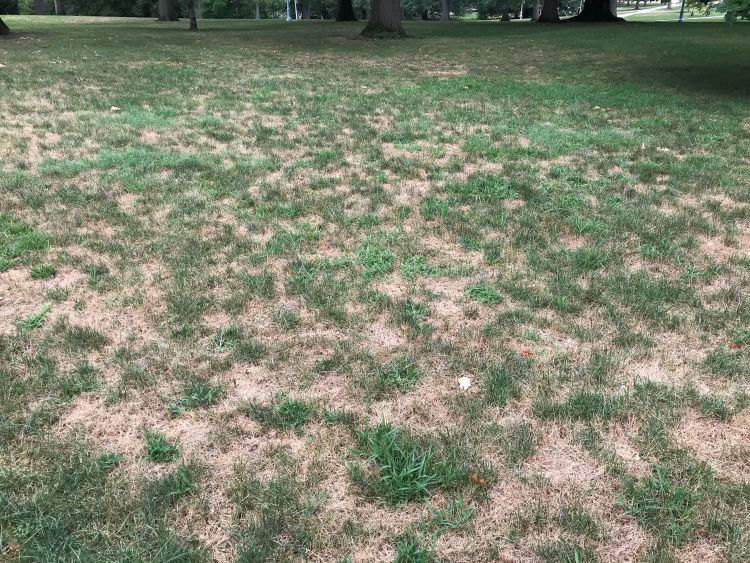
The most common reason for rejected projects is the quality of your lawn. Our program focuses on reducing water use for lawns. By concentrating on projects that replace well-kept turf (which requires more water) with water-efficient alternatives, we aim to boost our water conservation efforts. If your lawn project was rejected due to quality, it’s because we believe the proposed changes may not lead to significant water savings, which is our main goal.
What can you do?
We still want you to have a beautiful waterwise space even if you don’t qualify for our program! Here are the ways you can transform your space:
- You can explore our “Removal Methods” tab in this resource library to learn how to complete the removal yourself.
- You can visit the garden store and purchase waterwise Garden In A Box kits on your own.
- You can view the Garden Store here.
- You can hire a landscaper to finish your project.
- We recommend finding an accredited landscaper in your area. Use the Associated Landscaper Contractors of Colorado website to find someone near you.
- You can visit Colorado State University’s Extension to learn about xeriscaping on your own.
- Visit CSU extension to learn more here.
- Book a consultation with a member of our team to ask questions about how removal methods and various options can apply to your yard.

Program Requirements
Qualified Candidates
Our program focuses on reducing water use for lawns. By concentrating on projects that replace well-kept turf (which requires more water) with water-efficient alternatives, we aim to boost our water conservation efforts.
Your project area must be watered, well-maintained grass. Applicants with dead grass or overgrown weeds will not be accepted.
You must properly adjust and maintain your irrigation system and/or watering schedule to account for the new low-water landscape features.
We only accept new projects – you are not eligible for the program if you have already removed or killed your existing turf prior to receiving written acceptance into the program from Resource Central.
Replacement Materials
You must replace at least 50% of the removed turf area with plant material.
- Plant material: waterwise perennial gardens (preferred); Buffalograss (Buchloë dactyloides); other low-water grasses; clover; wildflower meadows;
- Ground cover: small-to-medium size patios and decks using permeable materials; permeable rock, stone, or gravel areas or pathways; or any other combination thereof.
- Not allowed: Artificial/synthetic turf, impermeable concrete or similar material, water features, invasive species, or new turf.
Property
You must be the legal owner and/or manager of the property located at the address below. It is your responsibility to comply with any and all municipal and/or homeowners’ association landscaping codes, standards, and ordinances.
If your property is covenant controlled and/or part of a homeowners’ association (HOA), you are responsible for seeking and obtaining proper approval for your landscape change project prior to starting any work. Resource Central is not responsible for fines, fees, or penalties imposed by HOAs or similar entities.

