DIY Cabinet Transformation
by Michelle Considine
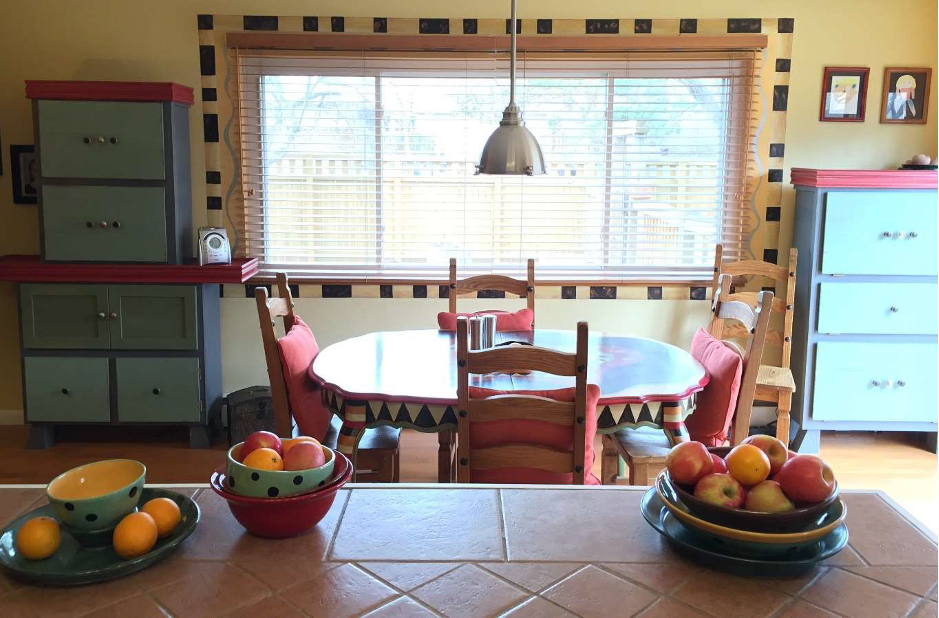
Extra storage near the kitchen table never goes to waste. There are always reasons to make space: the kids’ textbooks and school stuff, games, sprout-starting supplies, craft supplies, not to mention stuff related to cooking and eating! Instead of purchasing new furniture, consider making your own. You can customize it to suit your needs.
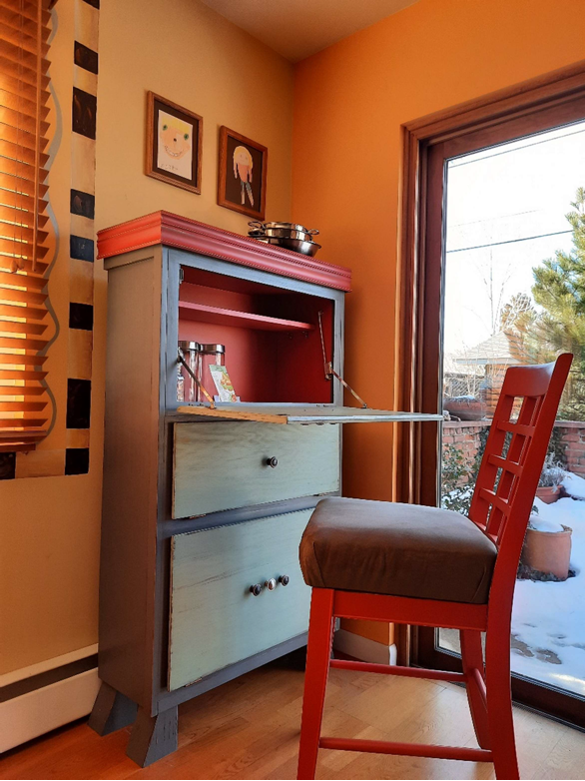
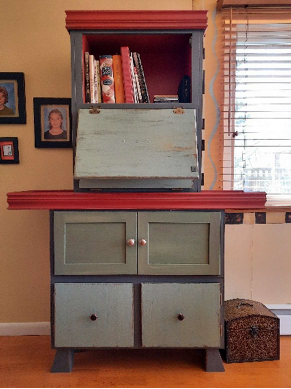
These pieces of furniture were once miscellaneous cabinets found at Resource Central. Now they are functional storage spaces — both with fold-out desks! Before the transformation, they were rocking hunter green shelf paper from the 80’s and the expected grime that comes with time. Note that these pieces are only 12 inches deep because they were originally upper cabinets. They have oak-veneer doors.
The nice thing about working with kitchen cabinets is the uniform sizing! It’s likely that you’ll find ones that stack nicely, even if they weren’t from the same set. Whether you like color or a neutral palette, paint is the key to creating an intentional, finished look in the end. Unleash your creativity — there are some diamonds in the rough.
Planning and Shopping
Before venturing to Resource Central or other materials reuse locations, have an idea in mind but let the available supplies spark your creativity! Measure your space and jot down notes on what will fit into your space. Don’t forget to bring along your measuring tape! Here are some things to consider:
- As well as the cabinets, pick up some trim for extra details to your piece. (see red trim photos, below.)
- Your storage needs some feet. Scrap lumber can be used for this. Wheels might be an interesting alternative!
- Would you like wood shelves inside your unit? Don’t forget to add that to your supplies list.
- Are you going to want a protruding shelf? If so, pick up a piece of plywood and more trim while at Resource Central.
- Small angle brackets are handy for attaching shelves and/or for attaching trim. Resource Central sometimes has this hardware available.
- Screws of various lengths, magnetic clasps for doors, additional knobs? Perhaps a hook on the side?
- Whether you like color or neutrals, consider paint for both the interior and exterior of your creation. It covers stains, blemishes, caulk and any hole patching. Consider Boulder County’s Hazardous Material Management Facility for picking up FREE cleaner, spackle, paint and/or primer! (Free to Boulder Country residents)
Quick List of Supplies
- Cabinets
- Trim
- Wood for storage unit feet
- Wood for shelves
- Small angle brackets
- Screws of various lengths
- Bolts
- Magnetic clasps for doors
- Additional Accessories: knobs & hooks
Construction Details
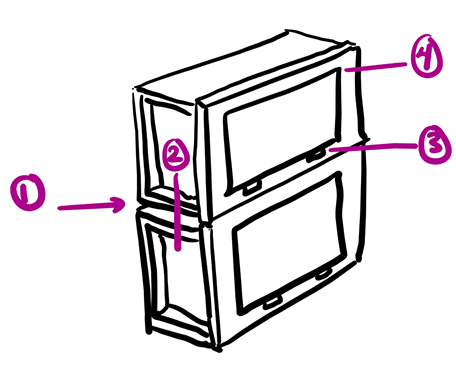
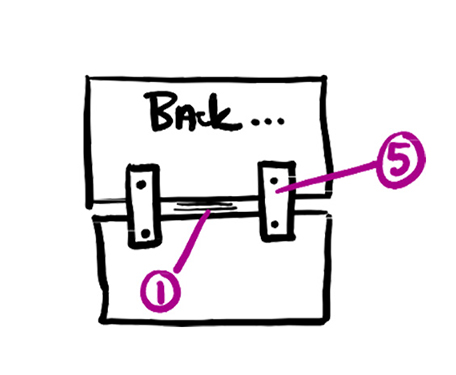
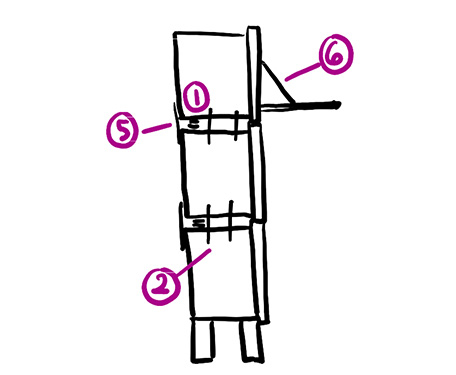
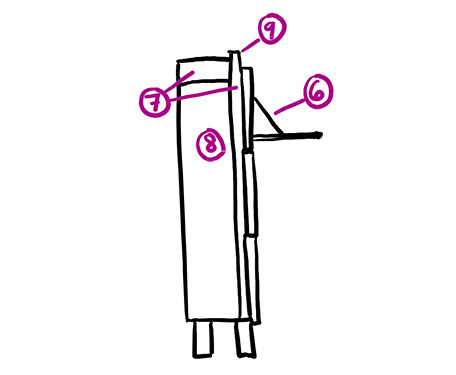
(See diagrams below – numbers match to the diagrams)
- Paint stir-sticks make nice spacers between body of cabinets, if needed.
- Use nuts, bolts, and washers to attach cabinets on both ends (which were originally the tops and bottoms of cabinets!) You may need a trip to the hardware store to find suitable bolts for this. Do 2 on each end.
- Move hinges of cabinet doors as needed. I like all of my doors to fold downward.
- Mount magnetic or spring-loaded clasps at the tops of cabinet doors so that they won’t open accidentally.
- On the back, I used flat metal brackets as needed. Think ahead so that you don’t screw through the back of the cabinet where it will show!
- Add secretary desk hinges to one of the doors and use it as a fold-up office. I needed to buy those hinges online but if you’re lucky and have a good eye, Resource Central might have them!
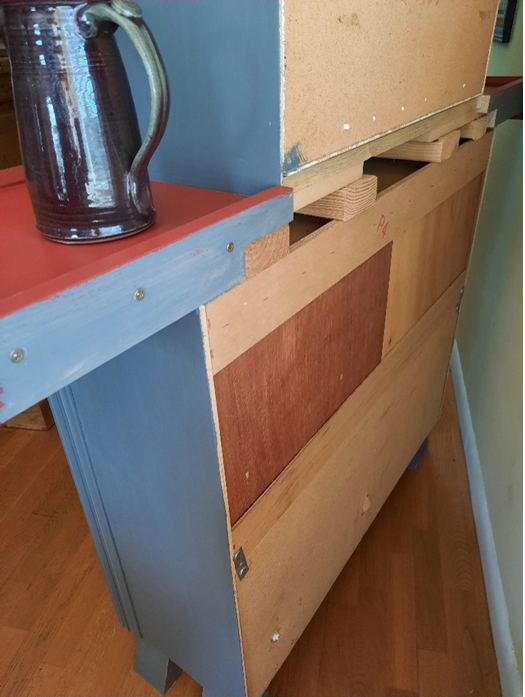
- I used 1×2 boards along the edges of the sides. I extended them beyond the top so that I could attach trim to the 1×2’s. I used short pieces of 1×4 at the top, as well. See drawings and photos below for more detail.
- I used eighth-inch plywood on the sides for a clean, finished look.
- Attach trim at the top. In my photos, see the red trim. For more detail, see the photo of the top.
- I chopped trapezoidal feet using a miter saw. A short section of 4×6 was at Resource that day…
- Clean with something like Krud Kutter, sand, primer, and paint, inside and out, as desired. I prefer satin enamel for a moderately flat finish yet cleanable surface. I used primer under the paint because there were oil stains in the cabinets.
Tips & Tricks
- Look for used hardware supplies first — there are some great deals out there!
- Paint stir-sticks make nice spacers between body of cabinets, if needed.
Check out the transformation!

Michelle Considine, long time enthusiast of Boulder’s Resource Central and, more recently, Art Parts, volunteers for these organizations with the intention of promoting reuse and creativity. Aside from being an environmentalist and upcycling artist of many mediums, Michelle privately tutors high school math and physics in the Boulder area as well as online, hikes year-round, and loves time with her family and friends.

