
Lawn removal comes down to three proven methods:
- Sheet Mulching (smothering grass with cardboard and compost over 6 to 8 months)
- Solarization (using black plastic and Colorado sun to bake out turf in 4 to 8 weeks)
- Physical Removal (cutting and hauling sod for immediate results)
This guide compares all three so you can pick the right approach for your yard, timeline, and budget.
When you’re ready to replace part of your lawn with a beautiful waterwise yard, the first step is choosing the right lawn removal method for your space, timeline, and comfort level. Some approaches are faster but more labor-intensive. Others take more time but require very little physical effort. Whether you’re starting with a small patch of traditional turf grass or a larger lawn replacement project, there is a method that can help prepare your landscape for healthy, low-water plants.
Outdoor water use accounts for roughly 50 to 55% of residential water consumption on Colorado’s Front Range. The bulk of that goes to thirsty turf. Removing grass is the single highest-impact water-saving step a homeowner can take. Below are three of the most effective lawn removal methods, along with their benefits, challenges, and step-by-step instructions to help you get started. If you would like some help with your waterwise landscape, Resource Central’s Lawn Replacement Program can help with discounted removal services. Our Garden In A Box kits make it easy to conserve water by planting a professionally designed low-water landscape.
Before You Remove: Irrigation Zones, HOA Rules, and Pre-Removal Planning
Before you cut a single piece of sod, three quick planning steps will save you money, water, and headaches later.
Map your sprinkler zones
Removing part of a zone while leaving the rest active wastes water and can damage the surrounding grass that is still being watered. If you aren’t sure how your system is laid out, schedule a free sprinkler evaluation through Resource Central’s Slow the Flow program. A technician will walk your yard with you and flag the zones that should be capped or converted.
Check your HOA rules
Colorado law now limits an HOA’s ability to prohibit waterwise landscaping, but implementation varies by association. A short email or phone call to your board before you start is usually all it takes to confirm you’re clear.
Look at your site
Steep slopes, deep-rooted grasses like Bermuda, and heavily shaded areas all change which removal method will actually work. Note those conditions now so you can match them to the right method below.
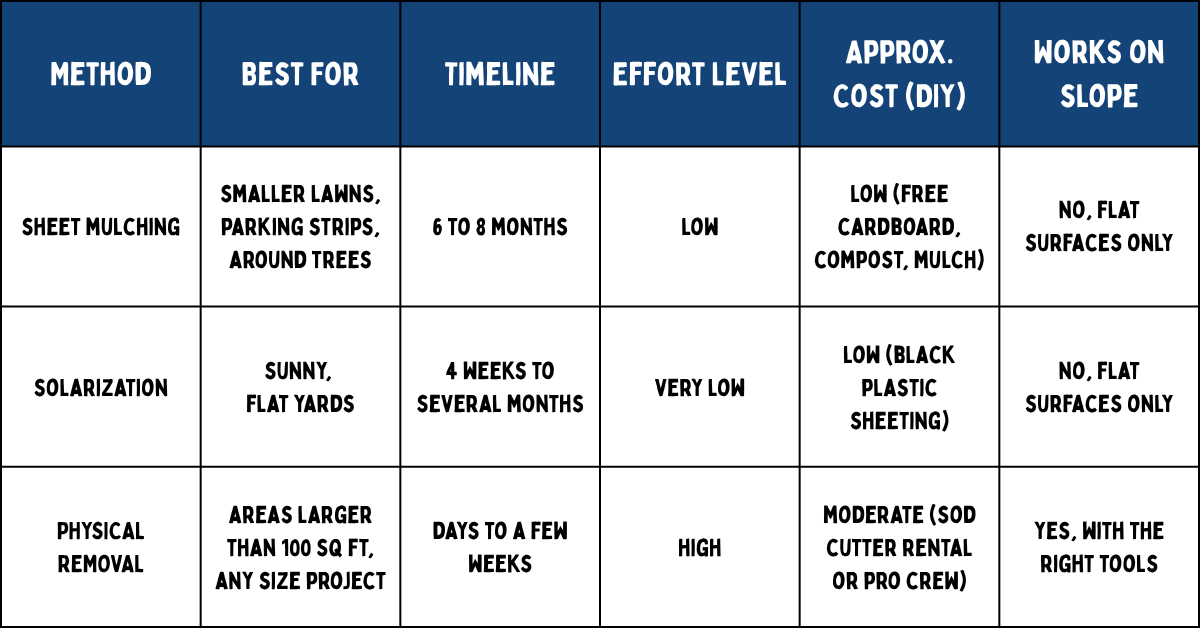
Comparing the Three Lawn Removal Methods at a Glance
Each method suits a different mix of yard size, timeline, budget, and physical ability. Use the table below as a quick decision tool, then read the full method sections for step-by-step guidance.
Method 1. Sheet Mulching / Lasagna Method
This cost-effective and environmentally friendly approach to lawn removal uses recycled newspaper or cardboard and does not require removing the existing grass. Putting down newspaper or cardboard and covering it with dirt smothers the grass. This supports efficient soil enrichment and home composting by creating nutrient-rich soil for a thriving waterwise garden. It is also one of the most carbon-friendly methods available, since organic material breaks down in place and builds long-term soil health instead of going to a landfill.
A Good Method for
- Great fit for participants in Resource Central’s Do-It-Yourself Lawn Replacement option
- Smaller lawns, parking strips, and around trees
- Homeowners who want to take a hands-on approach to building healthy soil over time
Benefits
- Cost-Effective – Smother your grass by covering it with recycled newspaper or cardboard, without a hefty price tag
- Minimal Labor – Let time and nature do the work
- Low Environmental Impact – Embrace a sustainable approach to lawn care
- No Sod Removal/Disposal – Skip the hassle of removing or disposing of sod
- Rich Soil – Build nutrient-rich soil for healthier plant growth
- Home Composting – Create space for convenient home composting
Challenges
- Slower Process – Takes about 6 to 8 months, best to start in the fall
- Weeds – This method can promote weed growth
- Not for Steep Slopes – Best for flat surfaces
- Not for Large Lawns – Ideal for smaller areas
Concerned about newspaper ink? Most newspaper inks are soy-based and safe for your lawn. Check with your paper provider if you would like additional peace of mind.
How to Layer Your Lawn using the Sheet Mulching Method
Step 1: Prep the Lawn
– Start in the fall and cut your grass as short as possible. This helps the newspaper or cardboard lay flat and stay in place.
Step 2: Add Compost
– Spread a 2-inch layer of nitrogen-rich compost over the area and water it well.
Step 3: Block the Sunlight
– Cover the lawn completely with overlapping cardboard or 10 to 12 sheets of newspaper. Be sure there are no gaps where sunlight can sneak through.
Step 4: Water the Layer
– Lightly water the cardboard or newspaper so it stays in place and begins to decompose.
Step 5: Add More Nutrients
– Spread another 2-inch layer of compost on top.
Step 6: Build Organic Matter
– Top the area with up to 18 inches of organic material such as leaves, grass clippings, straw, manure, or food scraps. Over time, this layer will naturally shrink as it breaks down.
Step 7: Finish with Mulch
– Add a 4-inch layer of mulch to help retain moisture and complete the bed.
Step 8: Let Nature Do the Work
– Water occasionally to support decomposition through the fall and winter months.
Step 9: Plant Your Garden
– By fall, your new waterwise garden area will be ready for planting. Once the bed is ready, Resource Central’s waterwise garden kits provide professionally designed, plant-by-number plans built for Colorado Front Range conditions.
Method 2. Solarization Method
Solarization uses the sun’s heat to naturally kill grass beneath a sheet of black plastic. Think of it as creating a temporary solar-powered oven for your lawn. This method works especially well in hot, sunny areas and requires minimal physical labor. In Colorado’s Front Range climate, late May through July produces the strongest results because of the intense sun and heat during those months. For homeowners participating in the Do-It-Yourself Lawn Replacement program, solarization can be a helpful low-labor option for sunny areas that are not immediately ready for planting.
Benefits
- Efficiency – Transform your lawn without extensive effort
- Cost-Effective – Achieve a beautiful garden without a hefty price tag
- Minimal Labor – Let nature do the work
- Low Environmental Impact – Use the sun instead of chemicals
- No Sod Removal/Disposal – Skip hauling away sod
- Composting – Dead grass can become compost
- Sunny Areas – Works well in hot, sunny conditions
Challenges
- Really Slow Process – Can take anywhere from 4 weeks to a year
- Unsightly – Black plastic may not blend into the landscape
- Not for Steep Slopes – Best for flat surfaces
- Shady Areas – Less effective in cool or shaded locations
Using the Sun to Remove Your Lawn
Step 1: Start at the Right Time
– Begin the solarization process in late spring or early summer. In Colorado, this is typically May or early June, with late May through July offering the most intense sun for fastest results.
Step 2: Prepare the Grass
– Cut the grass as short as possible and water it thoroughly before covering it.
Step 3: Cover the Area
– Place black polyethylene plastic over the lawn area and secure it tightly with rocks or metal stakes. Make sure the sheet is airtight with no holes or gaps.
Step 4: Let the Heat Build
– The plastic traps the sun’s heat, warming the top 6 inches of soil to around 140°F and killing the grass beneath it. A soil thermometer can help you monitor temperatures if desired.
Step 5: Wait for the Process to Work
– Leave the plastic in place for 4 to 8 weeks, or until the grass is fully dead.
Step 6: Remove the Plastic
– Once the grass is dead, remove the plastic and allow the grass to compost naturally.
What Comes Next?
After solarization, you’ve a few options:
- Follow the steps for the Sheet Mulching Method (except step 6) and plant right away.
- Begin planting immediately, but avoid disturbing soil deeper than 2 inches to reduce weed growth.
- Wait until the next growing season to plant.
For help choosing what goes in next, see our guide to native and drought-tolerant plants for Colorado.
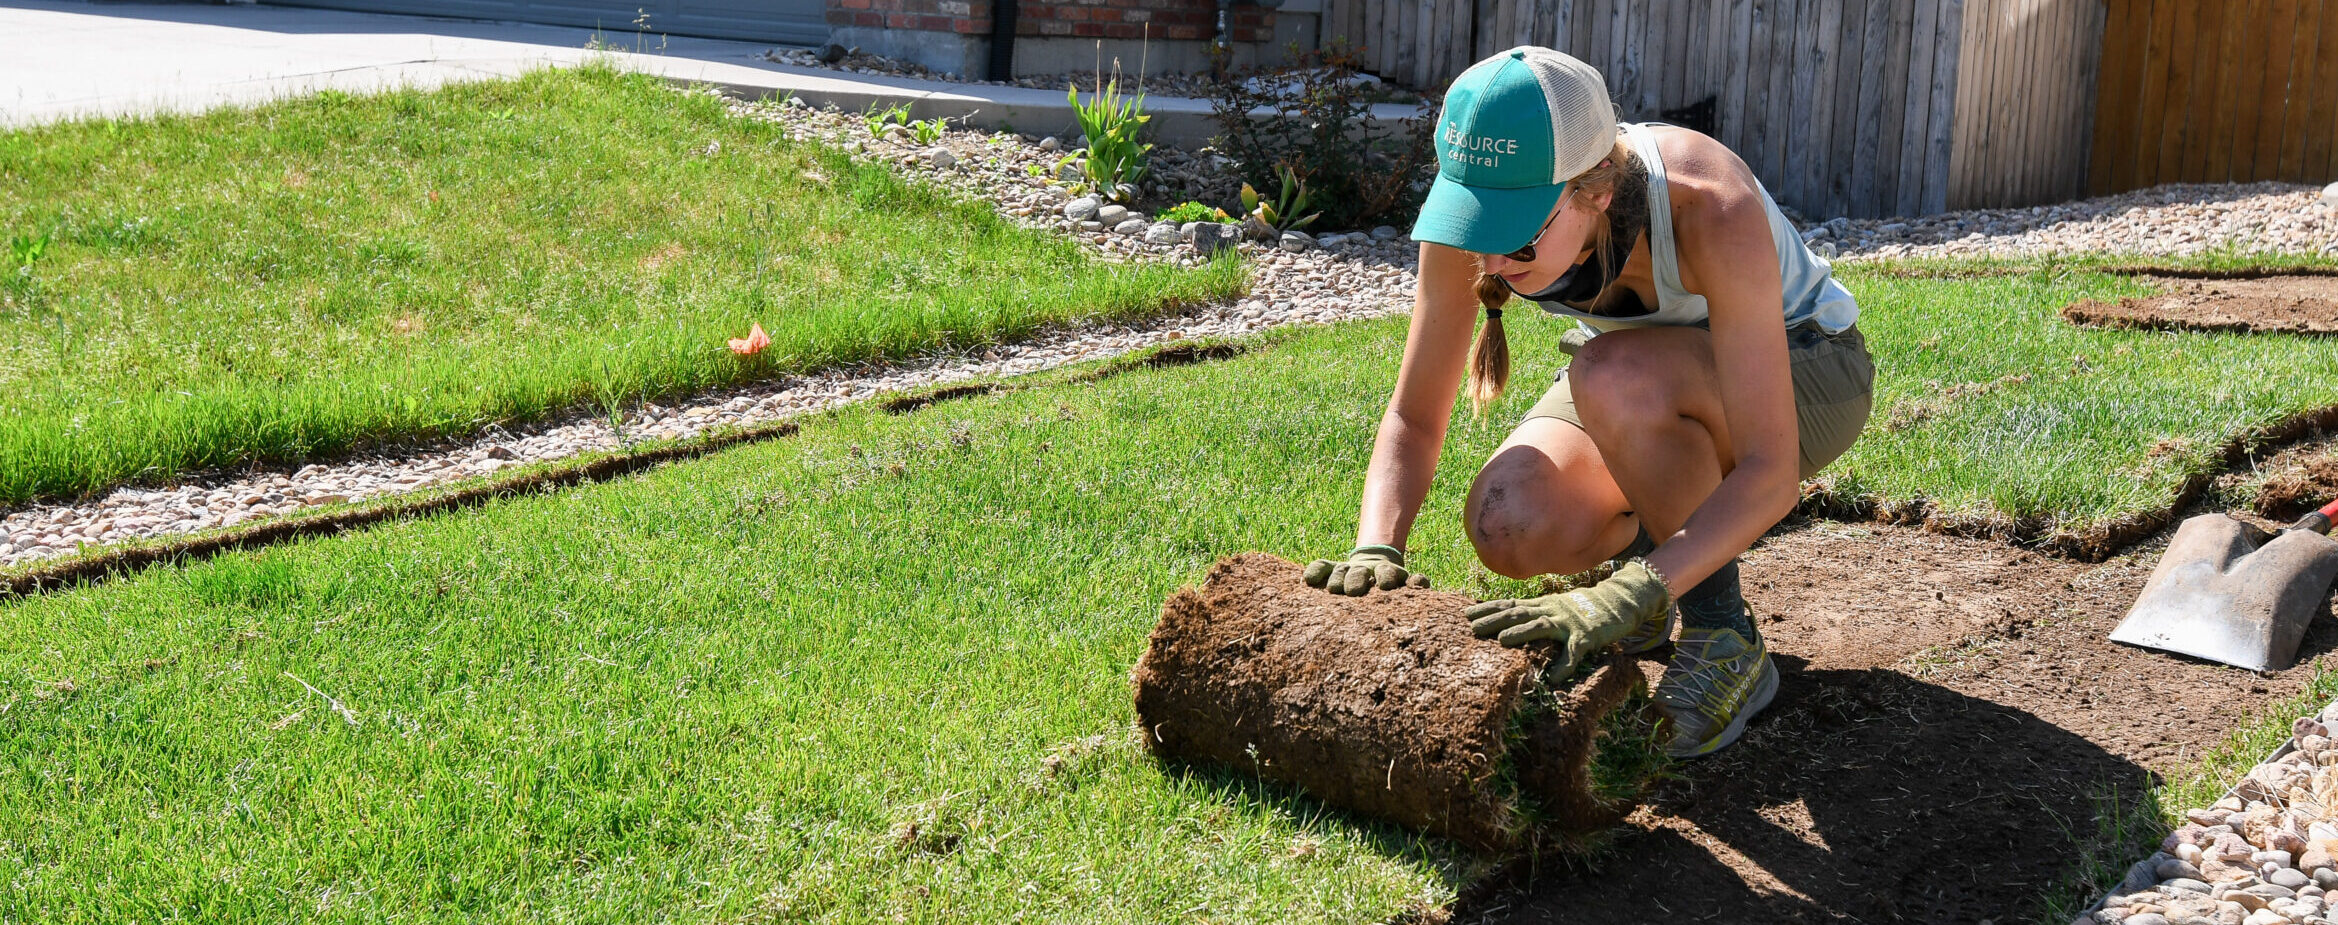
Method 3. Physical Removal
This is a method of physically removing your lawn with a sod cutter or manually with a square shovel or grape grubbing hoe. Of the three methods, this is the most labor-intensive option. If you’re planning a larger lawn transformation or want to skip the heavy lifting, Resource Central’s Lawn Replacement Program offers professional crew removal that takes turf off your hands entirely and hauls it away for composting.
Benefits
- Quick – Fastest method for lawn removal
- Compost – Removed sod can become compost
- Top Soil – Leaves most of your soil intact
- Get Fit – Manual removal provides a solid workout
- Large Areas – Effective for areas larger than 100 square feet
Challenges
- Labor-Intensive – Requires significant physical effort
- Regrowth – Grass may regrow from leftover roots or clippings
- Deep Roots – Not ideal for grasses with deep root systems, such as Bermuda grass
- Equipment Rentals – Sod cutters often need to be rented
Digging Up Your Lawn: A Simple Breakdown
Step 1: Choose Your Removal Method
– Decide whether you want to use a sod cutter or remove the lawn manually with a square shovel or grape grubbing hoe. As a general rule, two people can manually remove and haul away about 100 square feet of lawn in one hour.
Step 2: Rent Equipment if Needed
– If you choose to use a sod cutter and do not own one, rent one from a local tool supplier.
Step 3: Remove the Sod
– Using a sod cutter: cut the sod into strips, roll them up, and remove them from the area. Using a shovel or hoe: dig deeply enough to remove the roots completely. Root depth can vary depending on the type of grass.
Step 4: Prep for Planting
– Add compost to enrich the soil and prepare your new garden area for planting.
Step 5: Prevent Future Weeds
– Consider solarizing the area afterward to help eliminate any weeds that may remain in the soil.
Physical removal is the fastest path to a finished bed, but it is also the hardest on your back. For Colorado Front Range homeowners, our Lawn Replacement Program sends a professional crew to cut, lift, and haul your turf for composting at $1 per square foot for up to 425 square feet through partner water providers. You can apply for lawn removal service directly, or use the DIY lawn removal option to self-remove and receive up to four free Garden In A Box kits in exchange.
Choosing the Best Method for Your Yard
Each lawn removal method offers different advantages depending on your goals, budget, and timeline. If you’re looking for the most environmentally friendly option with rich soil benefits, sheet mulching may be the right fit. If you prefer a low-effort approach and have a sunny yard, solarization can work well. For the quickest transformation, physical removal delivers immediate results, especially for larger spaces.
No matter which method you choose, removing turf is an important first step toward creating a more resilient, waterwise landscape that supports long-term conservation and healthier outdoor spaces. With active drought declarations and historically low snowpack across Colorado in 2025 and 2026, water restrictions are tightening across Front Range utilities, so timing matters. The honest truth is that no method is wrong. The best one is whichever method actually gets you started. For more detailed walkthroughs, see our guide on how to remove your lawn.
What to Plant After Lawn Removal
One of the most common worries we hear is that removing turf means ending up with a yard full of rocks and dirt. It doesn’t. Replacing lawn with low-water perennials, native grasses, and pollinator plants produces color, texture, and year-round interest, plus habitat for hummingbirds, butterflies, and other wildlife.
Resource Central’s Garden Kits
Resource Central’s waterwise garden kits take the guesswork out of plant selection. Each Garden In A Box is a professionally designed, plant-by-number plan sized for Colorado Front Range conditions, with species chosen to handle clay soil, dry summers, and cold winters.
Native Plants
If you would rather design your own bed, native plants are a strong starting point. Front Range natives are adapted to local soil and drought cycles. They generally need far less water once established. See our roundup of waterwise alternatives to grass for more ideas.
How Resource Central’s Lawn Replacement Program Can Help
Resource Central has operated Colorado’s largest lawn replacement water conservation program for over five years. In 2025 alone, our crews removed 729 lawns across the Front Range.
The program is built to remove the biggest barrier to lawn conversion. The physical labor of digging out turf is eliminated when a professional crew comes to your home, cuts and hauls away the grass for composting, and prepares the area for planting. Through partnerships with 70+ water providers and municipalities, eligible homeowners pay $1 per square foot for up to 425 square feet of removal.
The results hold up. 100% of studied 2022 participants saved water after completing the program, averaging 15,000 gallons per household per year. Resource Central is a Four-Star Charity Navigator-rated nonprofit with 50 years of conservation history in Boulder, Colorado. That track record means every recommendation is grounded in real field experience and peer-reviewed data.
Prefer to do the work yourself? Use the DIY lawn removal option to self-remove your turf and receive up to four free Garden In A Box kits in exchange. Either way, you can start by checking eligibility and submitting an application through our Lawn Replacement Program, or apply for lawn removal service directly.
Frequently Asked Questions About Lawn Removal
How long does it take to remove a lawn?
It depends on the method. Physical removal takes a few days for a typical yard, especially with a sod cutter or a professional crew. Solarization runs 4 to 8 weeks during peak summer, sometimes longer. Sheet mulching is the slowest at 6 to 8 months, best started in fall so the bed is ready by the following growing season.
What is the cheapest way to remove grass?
Sheet mulching is usually the lowest-cost option because the main materials, cardboard and organic matter, are often free or available from local sources. You’ll spend a little on compost and mulch, but you avoid equipment rentals and sod disposal fees.
Can I remove my lawn if I have an HOA?
In most cases, yes. Colorado law limits an HOA’s ability to prohibit waterwise landscaping, though specifics vary by association. Confirm with your HOA board before starting, share your planting plan if asked, and keep documentation of your approval.
What should I plant after removing my lawn?
Low-water perennials, native grasses, and pollinator plants suited to the Front Range are a natural fit. Garden In A Box kits offer ready-made designs, and native plants adapted to Colorado clay soil and drought cycles tend to thrive with minimal care once established.
Does lawn removal really save water?
Yes. Resource Central program participants save an average of 15,000 gallons of water per household per year, and 100% of studied 2022 participants reduced their water use after completing the program.
For more detail, see our full frequently asked questions about lawn removal.
Why Lawn Removal Matters for Colorado’s Water Future
Outdoor water use accounts for roughly 50 to 55% of residential water consumption on Colorado’s Front Range. Most of that water goes to traditional turf grass. Cutting outdoor demand is one of the most effective ways a homeowner can lower their water footprint.
Colorado entered 2026 with active drought declarations and one of the lowest snowpacks on record from the 2025-2026 winter. Front Range utilities are rolling out tighter water restrictions in response, and that pressure is unlikely to ease quickly.
It helps to remember that the Front Range was originally high-desert landscape. The heavily irrigated turf yards common across Boulder, Denver, Longmont, and the rest of the region are a relatively recent import of eastern landscaping norms, dating back to the late 1800s. Lawn removal is one of the most effective steps a homeowner can take to bring yards back into alignment with the local climate. The result is a beautiful, low-maintenance landscape rather than a sacrifice. Learn more about the benefits of removing your lawn.