
Here in Colorado, we live in a high desert climate where water is a hot commodity. 80% of our population lives on the Eastern Slope of the Rocky Mountains while only 20% of Colorado’s water is actually available there. With populations expected to multiply in the Front Range in the coming years, we need to pay more attention to how we are using this invaluable resource. Removing some (or all!) of your turf and replacing it with a beautiful Xeriscape garden (water-efficient garden) is an easy and effective way to reduce your water use and make an impact! While you may not be willing to transform all of your yard to Xeric, there is probably a portion of your lawn that you can part with. Turf areas that are on steep slopes, irregularly shaped areas, narrow mowing strips, along fences, or in any other hard-to-water places are great candidates for a transformation to Xeriscape.
When watered and maintained effectively, replacing your turf with Xeriscape can reduce your outdoor water use by up to 60%! On average, 50% of household water is used for landscape irrigation, so by converting even a small portion of your turf to Xeriscape, the potential water savings are HUGE!
In addition to the incredible water-saving power of turf to Xeriscape conversion, turf replacement also offers you the following benefits:
- Enjoy your yard more, maintain it less – Other than the annual pruning and a bit of watering, Xeriscaping requires very little maintenance and care. No more mowing! Period.
- Promote a healthy ecosystem – For wildlife, a lawn is a barren wasteland, a monoculture offering very little support for insect and animal life. Replacing even a portion of your lawn with a Xeric garden is one of the best things you can do to create a sustainable landscape, increase biodiversity, and nourish wildlife in the areas surrounding your home.
- Improve the health of your soil – In the compact clay soils of Colorado, a large portion of water is lost to run-off and turf roots are often very shallow. Replacing these shallow-rooted grasses with longer-rooted Xeric plants produces healthier soil, which has the ability to absorb more water and leads to less run-off.
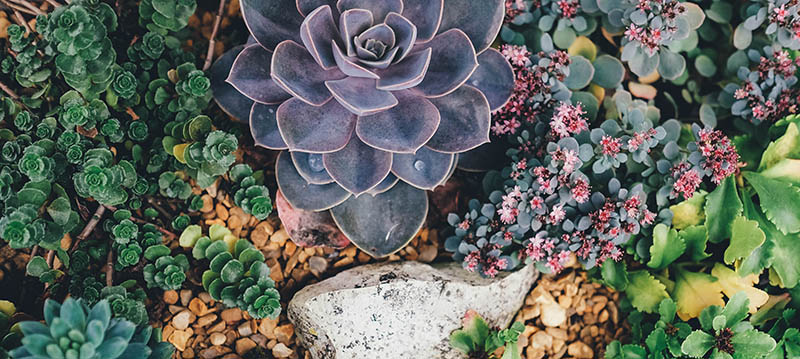
- Enhance the beauty of your landscape – Who can resist the popping reds and whites of the Crimson Star Columbine, the oranges and pinks of the blossoming Sunset Hyssop, or the bright yellow of the Missouri Evening Primrose? Xeric plants such as these add a vibrant and attractive splash of color to an otherwise uniform sea of green.
- Create a more sustainable landscape – Here in the Front Range, we live in a high desert climate with hot, dry summers. Yet, the turf that dominates our lawns, Kentucky Bluegrass, is adapted for growth in cool, humid climates. That simply doesn’t line up. By converting your turf to Xeriscape, you are choosing a landscape that is more appropriate for and adapted to thrive in our local climate.
- Implement an easy alternative to difficult to manage turf areas – If you are having trouble growing, watering, or maintaining your turf on steep slopes, irregularly shaped areas, narrow mowing strips, along fences, or in any other hard-to-water places, then get rid of this stressor altogether. Replace your turf with low-maintenance Xeriscaping.
HOW DO I GET RID OF MY TURF?
Contrary to common myth, you don’t have to be a landscape professional or extremely strong and muscular to successfully kill and/or remove your turf. In fact, with a few easy steps and a little patience, anyone can do it! Offering a variety of options to meet your specific needs, the following section outlines four different ways for killing and removing your turf successfully. The four recommended methods are: Solarization, Sheet Covering (or Lasagna Gardening), Physical Removal, and Vinegar.
While perusing these options, be sure to ask yourself: What size is the turf area that I want to remove? How much manual labor do I want to invest in the process? How much money do I want to spend? And how quickly do I want the grass to be gone? The answers to these questions will help you select the method that is right for you.
1) Solarization
What is it? : With this method you will cover the area of turf that you wish to kill with a black plastic sheet, creating a sun-powered sauna for your grass that is an uninhabitable place for it to live.
Benefits:
- Efficient
- Inexpensive
- Minimal labor needed
- Minimal environmental impact
- Can create compost from your dead grass
- Good for hot, sunny areas
Challenges:
- Slower method – can take anywhere from 6 weeks to a year to fully kill your grass
- Unsightly – may have the neighbors wondering when the painting is going to begin
- Does not work in cool, shady areas
How do I do it? : This method will only work for a hot and sunny area with high summer temperatures, so make sure that you select an area of turf that meets these requirements. Do not attempt this method in areas that are shady or cool – it will not work! Follow these easy steps to kill your turf using the Solarization method:
- Begin the Solarization process when spring is turning to summer. In Colorado, this is typically in May and early June.
- Cut your grass as short as possible and water it well to prepare the turf for the process.
- Cover the turf area that you wish to kill with a black polyethylene sheet (can be purchased at your local hardware store). Hold the sheet in place with heavy rocks or metal stakes. Make sure that the entire area is covered, and that it is airtight with no leaks or holes. The black plastic will act as a trap for the sun’s radiant heat, and it will kill the grass by heating the top 6 inches of soil to about 140 degrees Fahrenheit. You can use a soil thermometer or temperature probe to verify that the soil is heating as desired.
- Depending on the weather, leave in place for 4 to 8 weeks or until the grass is dead.
- Remove the plastic and leave the dead grass to compost.
- At this point, you have three main options: 1) Follow the steps (except step 6) for “Sheet Covering (or Lasagna Gardening)”, and plant right away (not next spring). 2) Depending on how long it has taken to kill the grass and how much time is left in the growing season – you can begin planting right away, but be sure not to cultivate any soil that is deeper than 2 inches! It is possible that weed seeds at deeper levels will surface and grow. 3) Wait until next year to plant.
2) Sheet Covering (or Lasagna Gardening)
What is it? : This is a method of killing your turf by covering it with newspaper or cardboard and layering it with organic matter and mulch.
Benefits:
- Efficient
- Inexpensive
- Minimal labor
- Minimal environmental impact
*If you are concerned about the toxicity of using newspaper in your soil, not to worry! While traditional newspaper inks contained toxic cadmium, lead, and chromium, most inks of the 21st century are soy-based and safe to use on your lawn. You can always call your paper to check on the type of ink that they use.
- Does not require removal/disposal of turf
- Builds rich soil
- Provides a place to compost kitchen scraps, leaves, yard clippings, etc. at home
Challenges:
- Slower method – about 6 months (starting in the fall)
- Not practical for steep slopes
- Not ideal for huge lawn areas
How do I do it? :
- Start in the fall. Cut your grass as short as possible. This will ensure that the newspapers or cardboard lay flat in place.
- Spread a 2 inch layer of compost that is high in nitrogen over the area to be replaced. Moisten well.
- Cover the area of turf that you wish to kill with overlapping cardboard (used boxes will work just fine) or newspaper (10 to 12 sheets thick). Be sure to fully overlap in different directions and that no sunlight can get through, otherwise, the grass will find a way to survive!
- Water the newspaper/cardboard. Be careful not to water too heavily, or the paper may start to tear. You just need it to be wet enough to stay in place and speed up the decomposition process.
- Cover the newspaper/cardboard with another 2 inch layer of compost.
- Top the compost with up to 18 inches of organic materials (grass clippings, leaves, farm manure, straw, food scraps). As time goes on, this pile of organic material will shrink in size, and by spring it will be ready for planting.
- Top it all off with a 4 inch layer of mulch.
- Water the bed occasionally to make for better decomposition.
- Plant in the spring.
3) Physical Removal
What is it? : This is a method of physically removing your turf with a sod cutter or manually with a square shovel or grape grubbing hoe.
Benefits:
- Fastest way to remove turf
- The removed sod makes great compost
- Leaves the majority of your soil intact
- If you’re doing it manually, you’ll get a good workout
- Good for areas greater than 100 square feet
Challenges:
- Labor-intensive
- Higher chance of turf regrowth than other methods – sometimes roots and grass clipping will resprout
- Will not work for long rooted grasses such a Bermuda Grass – the sod cutter does not remove the roots that reach several feet below the surface
- If you use a sod cutter, this will require a piece of machinery that you likely do not own
How do I do it? :
- Based on the size of the turf area that you want to remove, decide whether you want to use a sod cutter or a square shovel/grape grubbing hoe. On average, two people can manually remove and haul away 100 square feet of turf in an hour. If you do not own a sod cutter, and that is the way that you would like to go, then rent one from your local tool supplier.
- Sod cutter – Once you get your hands on a sod cutter, you will simply cut your sod into strips, roll them up, and get rid of them (or you can turn them upside-down and use them for compost). Shovel or hoe – The same steps apply: Dig it up and move it out! Make sure you dig deeply enough to remove the roots – root depth will vary from yard to yard. Getting a friend or neighbor to help you out is highly encouraged.
- Add some compost to your new garden area and get your garden ready for planting. You may want to consider Solarizing (see “Solarization” section) the area to make sure to kill any weeds that may remain in the soil.
4) Vinegar
What is it? : Vinegar is a safe and natural alternative to herbicides. With this method, you can kill your turf by applying vinegar to it.
Benefits:
- Eco-friendly
- Quick way to kill your turf
Challenges:
- Only good for small areas
- Expensive
- Works best in hot conditions
- This is a lesser known method, and there is not a lot of information available on its effectiveness
How do I do it? :
- Select a variety of white or pickled vinegar that you would like to use.
- Do not apply near plants that you want to keep.
- Saturate the grassy area that you would like to kill with vinegar.
- Wait 2 to 4 days, and your grass should be dead.
- Dig it up and prepare your garden for planting.
Herbicides – not recommended
*At CRC, we want to do what is best for the planet. We do not recommend this method as a safe or healthy option for human, plant, or animal health. Using toxic chemicals to kill your turf is dangerous for all that are exposed to them. We also believe that you have the freedom of choice, and we trust you to make the choices that are best for your needs and circumstances.
What is it? : This is a method of killing your grass by spraying it with toxic chemicals.
Benefits:
- Has the potential to be a quick way to kill your grass
Challenges:
- Uses chemicals that can leave unwanted residue in your soil for weeks, months, and even years to come
- High risk of the chemicals used ending up in your local water supply
- Often does not fully kill your lawn on the first try – chemicals must be applied multiple times to get the job done
- Even after the layer upon layer of herbicides have been applied, there is still a chance that some of your grass will come back
- Expensive
- Only good for small areas
How do I do it? : If you are still set on using herbicides to kill your lawn, then keep the following tips in mind:
- Choose an herbicide containing glyphosates because they are far less residual than others.
- Water your lawn 24 hours prior to spraying.
- Apply the herbicide on a sunny, windless day when the temperature is over 60 degrees Fahrenheit. Be sure not to spray any plants in surrounding areas.
- After a week or two, the grass should be dead.
- If the turf has not died after four weeks, then reapply.
- For instructions on when it is safe to plant your garden after using herbicides, refer to the label on your chosen product – timing varies.
Hopefully, at this point, you have found the method that works for you! If you would like additional information on turf removal and the 5 methods discussed above, the links listed in the “Turf Removal Resources” section are a great place to look. Happy gardening!
All of this information was collected with help from the following friends: